Reference
- About this guide
- I Advanced administration
- II System
- 8 32-bit and 64-bit applications in a 64-bit system environment
- 9 Introduction to the boot process
- 10 The
systemddaemon - 11
journalctl: Query thesystemdjournal - 12 The boot loader GRUB 2
- 13 Basic networking
- 14 UEFI (Unified Extensible Firmware Interface)
- 15 Special system features
- 16 Dynamic kernel device management with
udev
- III Services
- IV Mobile computers
- A An example network
- B GNU licenses
4 Remote graphical sessions with VNC #Edit source
Abstract#
Virtual Network Computing (VNC) enables you to access a remote computer via a graphical desktop, and run remote graphical applications. VNC is platform-independent and accesses the remote machine from any operating system. This chapter describes how to connect to a VNC server with the desktop clients vncviewer and Remmina, and how to operate a VNC server.
openSUSE Leap supports two different kinds of VNC sessions: One-time sessions that “live” as long as the VNC connection from the client is kept up, and persistent sessions that “live” until they are explicitly terminated.
A VNC server can offer both kinds of sessions simultaneously on different ports, but an open session cannot be converted from one type to the other.
4.1 The vncviewer client #Edit source
Important: Supported display managers
A machine can reliably accept VNC connections only if it uses a display
manager that supports the XDMCP protocol. While
gdm, lxdm, or
lightdm support XDMCP, the KDE 5 default display
manager sddm does not support it. When changing the
default display manager, remember to log out of the current X session and
restart the display manager with
> sudo systemctl restart xdm.service
To connect to a VNC service provided by a server, a client is needed. The
default in openSUSE Leap is vncviewer, provided by the
tigervnc package.
4.1.1 Connecting using the vncviewer CLI #Edit source
To start your VNC viewer and initiate a session with the server, use the command:
> vncviewer jupiter.example.com:1Instead of the VNC display number you can also specify the port number with two colons:
> vncviewer jupiter.example.com::5901Note: Display and port number
The actual display or port number you specify in the VNC client must be
the same as the display or port number picked by the
vncserver command on the target machine. See
Section 4.4, “Configuring persistent VNC server sessions” for further info.
4.1.2 Connecting using the vncviewer GUI #Edit source
By running vncviewer without specifying
--listen or a host to connect to, it will show a window
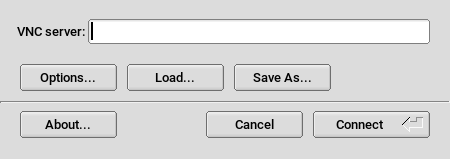
to ask for connection details. Enter the host into the field like in Section 4.1.1, “Connecting using the vncviewer CLI”
and click .
Figure 4.1: vncviewer #
4.1.3 Notification of unencrypted connections #Edit source
The VNC protocol supports different kinds of encrypted connections, not to be confused with password authentication. If a connection does not use TLS, the text “(Connection not encrypted!)” can be seen in the window title of the VNC viewer.
4.2 Remmina: the remote desktop client #Edit source
Remmina is a modern and feature rich remote desktop client. It supports several access methods, for example VNC, SSH, RDP, and Spice.
4.2.1 Installation #Edit source
To use Remmina, verify whether the remmina package is installed on your system, and install it if not. Remember to install the VNC plug-in for Remmina as well:
# zypper in remmina remmina-plugin-vnc4.2.2 Main window #Edit source
Run Remmina by entering the remmina command.
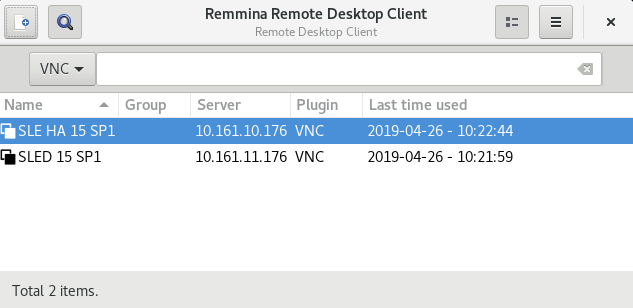
Figure 4.2: Remmina's main window #
The main application window shows the list of stored remote sessions. Here you can add and save a new remote session, quick-start a new session without saving it, start a previously saved session, or set Remmina's global preferences.
4.2.3 Adding remote sessions #Edit source
To add and save a new remote session, click  in the
top left of the main window. The
window opens.
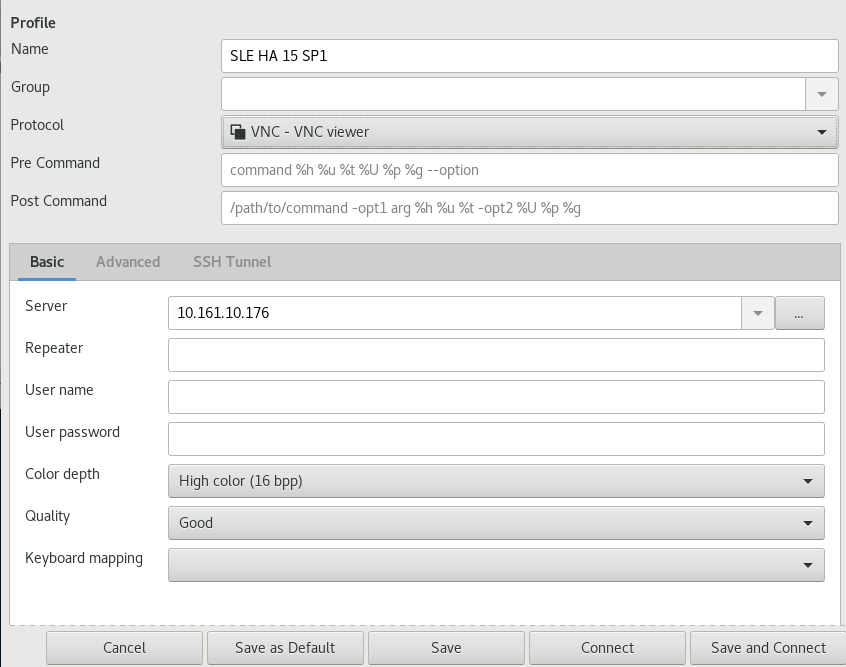
Figure 4.3: Remote desktop preference #
Complete the fields that specify your newly added remote session profile. The most important are:
- Name
Name of the profile. It will be listed in the main window.
- Protocol
The protocol to use when connecting to the remote session, for example VNC.
- Server
The IP or DNS address and display number of the remote server.
- User name, password
Credentials to use for remote authentication. Leave empty for no authentication.
- Color depth, quality
Select the best options according to your connection speed and quality.
Select the tab to enter more specific settings.
Tip: Disable encryption
If the communication between the client and the remote server is not encrypted, activate , otherwise the connection fails.
Select the tab for advanced SSH tunneling and authentication options.
Confirm with . Your new profile will be listed in the main window.
4.2.4 Starting remote sessions #Edit source
You can either start a previously saved session, or quick-start a remote session without saving the connection details.
4.2.4.1 Quick-starting remote sessions #Edit source
To start a remote session quickly without adding and saving connection details, use the drop-down box and text box at the top of the main window.
Figure 4.4: Quick-starting #
Select the communication protocol from the drop-down box, for example 'VNC', then enter the VNC server DNS or IP address followed by a colon and a display number, and confirm with Enter.
4.2.4.2 Opening saved remote sessions #Edit source
To open a specific remote session, double-click it from the list of sessions.
4.2.4.3 Remote sessions window #Edit source
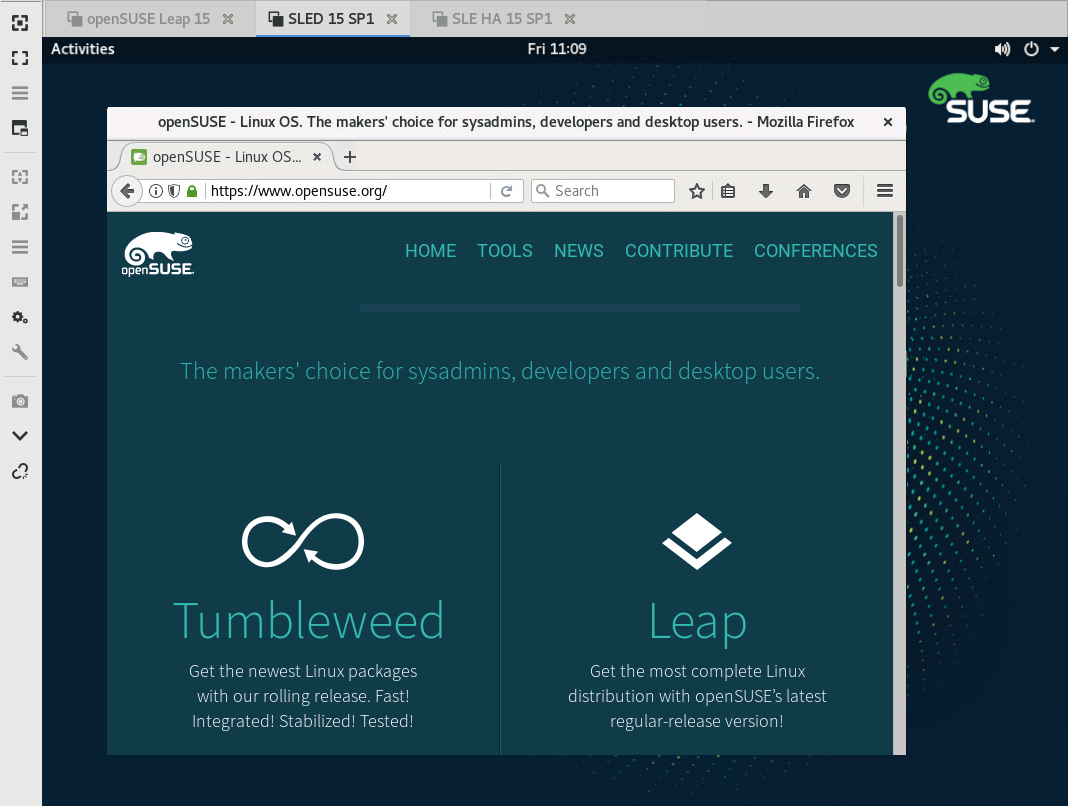
Remote sessions are opened in tabs of a separate window. Each tab hosts one session. The toolbar on the left of the window helps you manage the windows/sessions, such as toggle fullscreen mode, resize the window to match the display size of the session, send specific keystrokes to the session, take screenshots of the session, or set the image quality.
Figure 4.5: Remmina viewing remote session #
4.2.5 Editing, copying, and deleting saved sessions #Edit source
To edit a saved remote session, right-click its name in Remmina's main window and select . Refer to Section 4.2.3, “Adding remote sessions” for the description of the relevant fields.
To copy a saved remote session, right-click its name in Remmina's main window and select . In the window, change the name of the profile, optionally adjust relevant options, and confirm with .
To Delete a saved remote session, right-click its name in Remmina's main window and select . Confirm with in the next dialog.
4.2.6 Running remote sessions from the command line #Edit source
If you need to open a remote session from the command line or from a batch file without first opening the main application window, use the following syntax:
> remmina -c profile_name.remmina
Remmina's profile files are stored in the
.local/share/remmina/ directory in your home
directory. To determine which profile file belongs to the session you want
to open, run Remmina, click the session name in the main window, and read
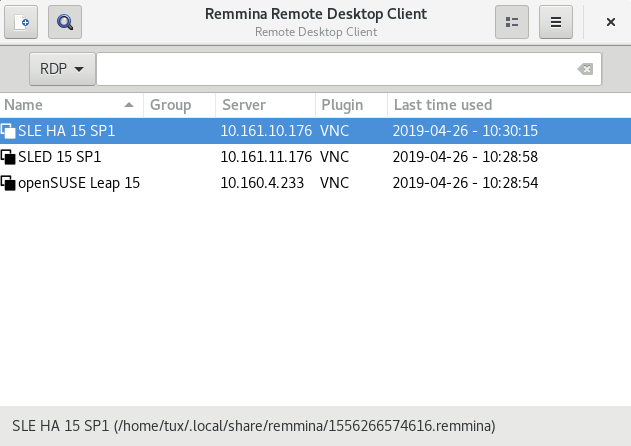
the path to the profile file in the window's status line at the bottom.
Figure 4.6: Reading path to the profile file #
While Remmina is not running, you can rename the profile file to a more
reasonable file name, such as sle15.remmina. You can
even copy the profile file to your custom directory and run it using the
remmina -c command from there.
4.3 Configuring one-time sessions on the VNC server #Edit source
A one-time session is initiated by the remote client. It starts a graphical login screen on the server. This way you can choose the user which starts the session and, if supported by the login manager, the desktop environment. When you terminate the client connection to such a VNC session, all applications started within that session will be terminated, too. One-time VNC sessions cannot be shared, but it is possible to have multiple sessions on a single host at the same time.
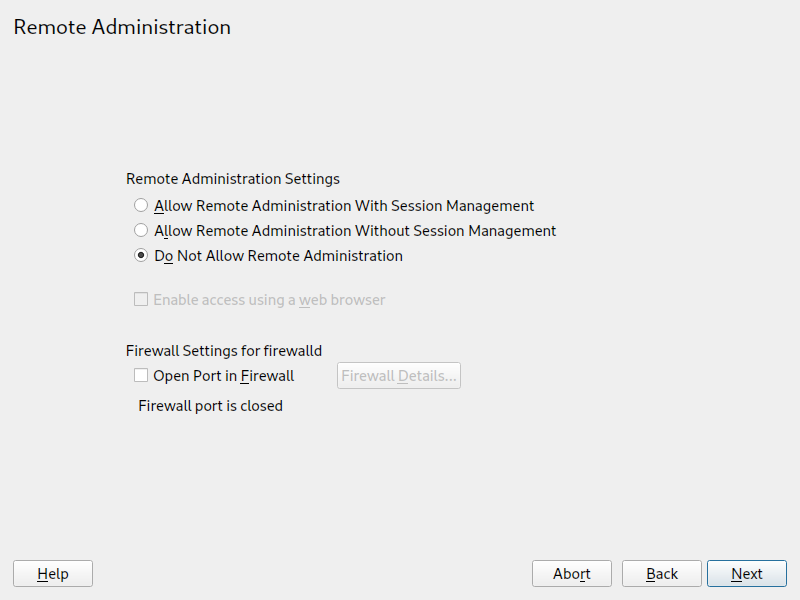
Procedure 4.1: Enabling one-time VNC sessions #
Start › › .
Check .
Activate if you plan to access the VNC session in a Web browser window.
If necessary, also check (for example, when your network interface is configured to be in the External Zone). If you have more than one network interface, restrict opening the firewall ports to a specific interface via .
Confirm your settings with .
In case not all needed packages are available yet, you need to approve the installation of missing packages.
Tip: Restart the display manager
YaST makes changes to the display manager settings. You need to log out of your current graphical session and restart the display manager for the changes to take effect.
Figure 4.7: Remote administration #
4.3.1 Available configurations #Edit source
The default configuration on openSUSE Leap serves sessions with a
resolution of 1024x768 pixels at a color depth of 16-bit. The sessions are
available on ports 5901 for
“regular” VNC viewers (equivalent to VNC display
1) and on port
5801 for Web browsers.
Other configurations can be made available on different ports, see Section 4.3.3, “Configuring one-time VNC sessions”.
VNC display numbers and X display numbers are independent in one-time sessions. A VNC display number is manually assigned to every configuration that the server supports (:1 in the example above). Whenever a VNC session is initiated with one of the configurations, it automatically gets a free X display number.
By default, both the VNC client and server try to communicate securely via a self-signed SSL certificate, which is generated after installation. You can either use the default one, or replace it with your own. When using the self-signed certificate, you need to confirm its signature before the first connection—both in the VNC viewer and the Web browser.
4.3.2 Initiating a one-time VNC session #Edit source
To connect to a one-time VNC session, a VNC viewer must be installed, see
also Section 4.1, “The vncviewer client”. Alternatively use a
JavaScript-capable Web browser to view the VNC session by entering the
following URL: http://jupiter.example.com:5801
4.3.3 Configuring one-time VNC sessions #Edit source
You can skip this section, if you do not need or want to modify the default configuration.
One-time VNC sessions are started via the systemd socket
xvnc.socket. By default it offers six
configuration blocks: three for VNC viewers (vnc1 to
vnc3), and three serving a JavaScript client
(vnchttpd1 to vnchttpd3). By default
only vnc1 and vnchttpd1 are active.
To activate the VNC server socket at boot time, run the following command:
>sudosystemctl enable xvnc.socket
To start the socket immediately, run:
>sudosystemctl start xvnc.socket
The Xvnc server can be configured via the
server_args option. For a list of options, see
Xvnc --help.
When adding custom configurations, make sure they are not using ports that are already in use by other configurations, other services, or existing persistent VNC sessions on the same host.
Activate configuration changes by entering the following command:
>sudosystemctl reload xvnc.socket
Important: Firewall and VNC ports
When activating Remote Administration as described in
Procedure 4.1, “Enabling one-time VNC sessions”, the ports
5801 and
5901 are opened in the firewall.
If the network interface serving the VNC sessions is protected by a
firewall, you need to manually open the respective ports when activating
additional ports for VNC sessions. See
Book “Security and Hardening Guide”, Chapter 24 “Masquerading and firewalls” for instructions.
4.4 Configuring persistent VNC server sessions #Edit source
A persistent session can be accessed from multiple clients simultaneously. This is ideal for demonstration purposes where one client has full access and all other clients have view-only access. Another use case are training sessions where the trainer might need access to the trainee's desktop.
Tip: Connecting to a persistent VNC session
To connect to a persistent VNC session, a VNC viewer must be installed.
Refer to Section 4.1, “The vncviewer client” for more details. Alternatively
use a JavaScript-capable Web browser to view the VNC session by entering the
following URL: http://jupiter.example.com:5801
There are two types of persistent VNC sessions:
4.4.1 VNC session initiated using vncserver #Edit source
This type of persistent VNC session is initiated on the server. The session and all applications started in this session run regardless of client connections until the session is terminated. Access to persistent sessions is protected by two possible types of passwords:
a regular password that grants full access or
an optional view-only password that grants a non-interactive (view-only) access.
A session can have multiple client connections of both kinds at once.
Procedure 4.2: Starting a persistent VNC session using vncserver #
Open a shell and make sure you are logged in as the user that should own the VNC session.
If the network interface serving the VNC sessions is protected by a firewall, you need to manually open the port used by your session in the firewall. If starting multiple sessions you may alternatively open a range of ports. See Book “Security and Hardening Guide”, Chapter 24 “Masquerading and firewalls” for details on how to configure the firewall.
vncserveruses the ports5901for display:1,5902for display:2, and so on. For persistent sessions, the VNC display and the X display usually have the same number.To start a session with a resolution of 1024x768 pixel and with a color depth of 16-bit, enter the following command:
vncserver -alwaysshared -geometry 1024x768 -depth 16
The
vncservercommand picks an unused display number when none is given and prints its choice. Seeman 1 vncserverfor more options.
When running vncserver for the first time, it asks for a
password for full access to the session. If needed, you can also provide a
password for view-only access to the session.
The password(s) you are providing here are also used for future sessions
started by the same user. They can be changed with the
vncpasswd command.
Important: Security considerations
Make sure to use strong passwords of significant length (eight or more characters). Do not share these passwords.
To terminate the session shut down the desktop environment that runs inside the VNC session from the VNC viewer as you would shut it down if it was a regular local X session.
If you prefer to manually terminate a session, open a shell on the VNC
server and make sure you are logged in as the user that owns the VNC
session you want to terminate. Run the following command to terminate the
session that runs on display :1: vncserver
-kill :1
4.4.1.1 Configuring persistent VNC sessions #Edit source
Persistent VNC sessions can be configured by editing
$HOME/.vnc/xstartup. By default this shell script
starts the same GUI/window manager it was started from. In openSUSE Leap
this will either be GNOME or IceWM. If you want to start your session
with a window manager of your choice, set the variable
WINDOWMANAGER:
WINDOWMANAGER=gnome vncserver -geometry 1024x768
WINDOWMANAGER=icewm vncserver -geometry 1024x768
Note: One configuration for each user
Persistent VNC sessions are configured in a single per-user configuration. Multiple sessions started by the same user will all use the same start-up and password files.
4.4.2 VNC session initiated using vncmanager #Edit source
Procedure 4.3: Enabling persistent VNC sessions #
Start › › .
Activate .
Activate if you plan to access the VNC session in a Web browser window.
If necessary, also check (for example, when your network interface is configured to be in the External Zone). If you have more than one network interface, restrict opening the firewall ports to a specific interface via .
Confirm your settings with .
In case not all needed packages are available yet, you need to approve the installation of missing packages.
Tip: Restart the display manager
YaST makes changes to the display manager settings. You need to log out of your current graphical session and restart the display manager for the changes to take effect.
4.4.2.1 Configuring persistent VNC sessions #Edit source
After you enable the VNC session management as described in Procedure 4.3, “Enabling persistent VNC sessions”, you can normally connect to
the remote session with your favorite VNC viewer, such as
vncviewer or Remmina. You will be presented with the
login screen. After you log in, the 'VNC' icon will appear in the system
tray of your desktop environment. Click the icon to open the window. If it does not appear or if your desktop
environment does not support icons in the system tray, run
vncmanager-controller manually.
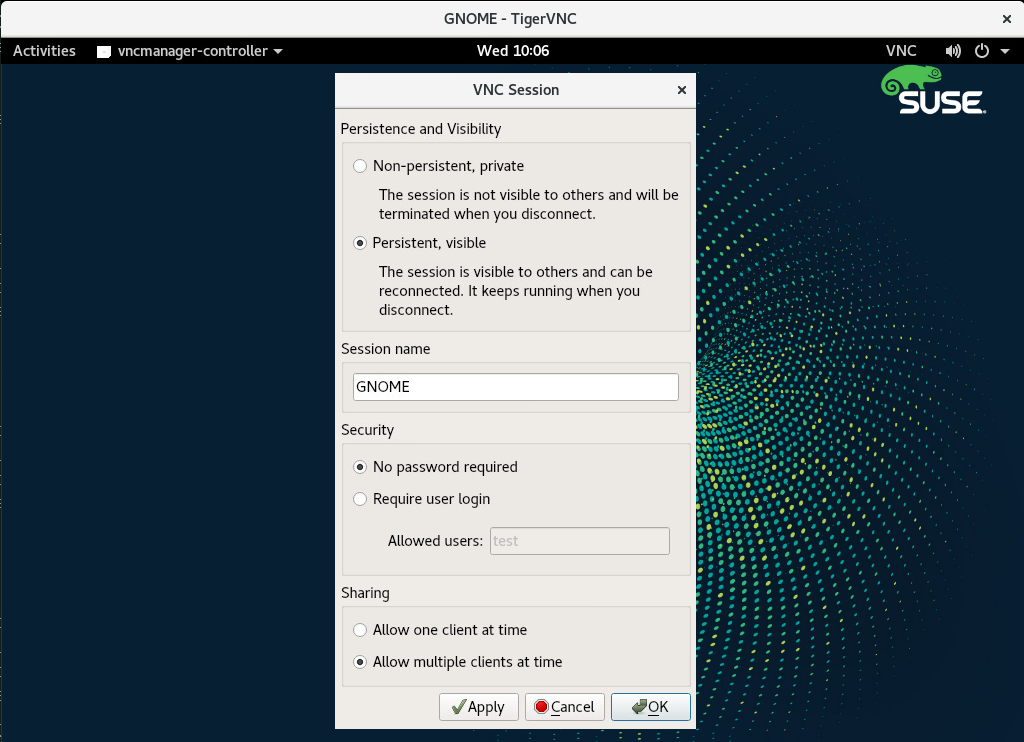
Figure 4.8: VNC session settings #
There are several settings that influence the VNC session's behavior:
This is equivalent to a one-time session. It is not visible to others and will be terminated after you disconnect from it. Refer to Section 4.3, “Configuring one-time sessions on the VNC server” for more information.
The session is visible to other users and keeps running even after you disconnect from it.
Here you can specify the name of the persistent session so that it is easily identified when reconnecting.
The session will be freely accessible without having to log in under user credentials.
You need to log in with a valid user name and password to access the session. Lists the valid user names in the text box.
Prevents multiple users from joining the session at the same time.
Allows multiple users to join the persistent session at the same time. Useful for remote presentations or training sessions.
Confirm with .
4.4.2.2 Joining persistent VNC sessions #Edit source
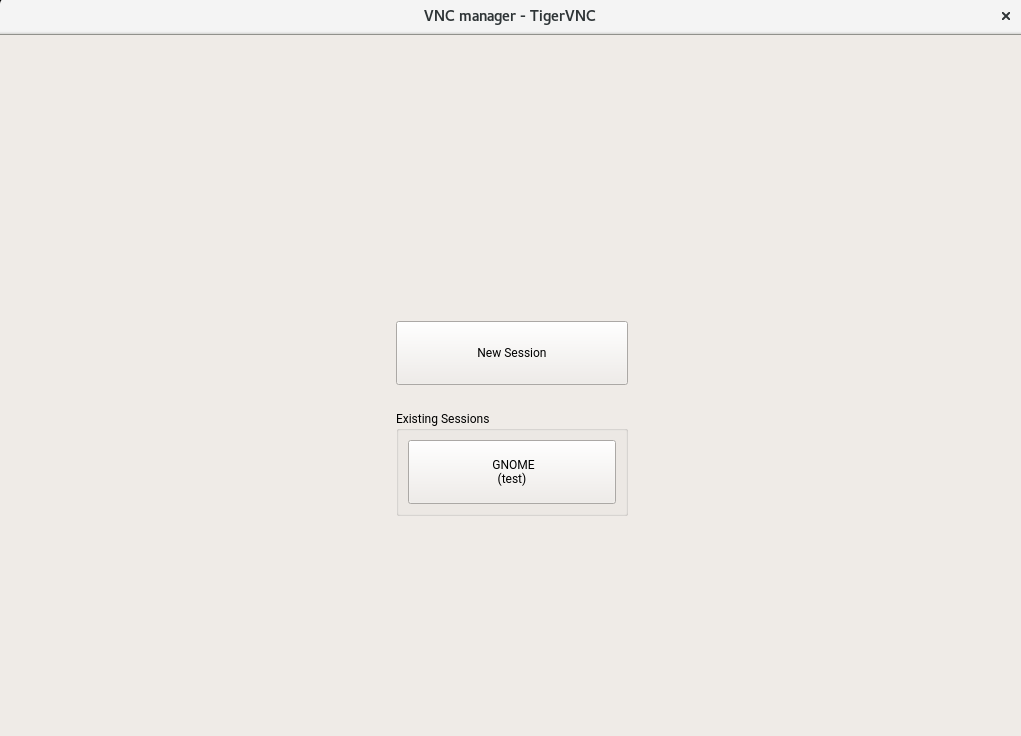
After you set up a persistent VNC session as described in Section 4.4.2.1, “Configuring persistent VNC sessions”, you can join it with your VNC viewer. After your VNC client connects to the server, you will be prompted to choose whether you want to create a new session, or join the existing one:
Figure 4.9: Joining a persistent VNC session #
After you click the name of the existing session, you may be asked for login credentials, depending on the persistent session settings.
4.5 Configuring encryption on the VNC server #Edit source
If the VNC server is set up properly, all communication between the VNC server and the client is encrypted. The authentication happens at the beginning of the session; the actual data transfer only begins afterward.
Whether for a one-time or a persistent VNC session, security options are
configured via the -securitytypes parameter of the
/usr/bin/Xvnc command located on the
server_args line. The -securitytypes
parameter selects both authentication method and encryption. It has the
following options:
Authentications #
- None, TLSNone, x509None
No authentication.
- VncAuth, TLSVnc, x509Vnc
Authentication using custom password.
- Plain, TLSPlain, x509Plain
Authentication using PAM to verify user's password.
Encryptions #
- None, vncAuth, plain
No encryption.
- TLSNone, TLSVnc, TLSPlain
Anonymous TLS encryption. Everything is encrypted, but there is no verification of the remote host. So you are protected against passive attackers, but not against man-in-the-middle attackers.
- X509None, x509Vnc, x509Plain
TLS encryption with certificate. If you use a self-signed certificate, you will be asked to verify it on the first connection. On subsequent connections you will be warned only if the certificate changed. So you are protected against everything except man-in-the-middle on the first connection (similar to typical SSH usage). If you use a certificate signed by a certificate authority matching the machine name, then you get full security (similar to typical HTTPS usage).
Tip: Path to certificate and key
With X509 based encryption, you need to specify the path to the X509 certificate and the key with
-X509Certand-X509Keyoptions.
If you select multiple security types separated by comma, the first one supported and allowed by both client and server will be used. That way you can configure opportunistic encryption on the server. This is useful if you need to support VNC clients that do not support encryption.
On the client, you can also specify the allowed security types to prevent a downgrade attack if you are connecting to a server which you know has encryption enabled (although our vncviewer will warn you with the "Connection not encrypted!" message in that case).

