Chapter 3. Creating A Control File
- Table of Contents
- 3.1. Using the Configuration Management System
- 3.2. Creating/Editing a Control File Manually
3.1. Using the Configuration Management System
In order to create the control file for a specific computer, a YaST2 based system is provided. This system depends on existing modules which are usually used to configure a computer in regular operation mode, i.e. after SuSE Linux is installed.
The configuration management system lets you create control files easily and additionally it lets you manage a repository of configurations for use in a networked environment and with multiple clients.

3.1.1. Creating a new Profile
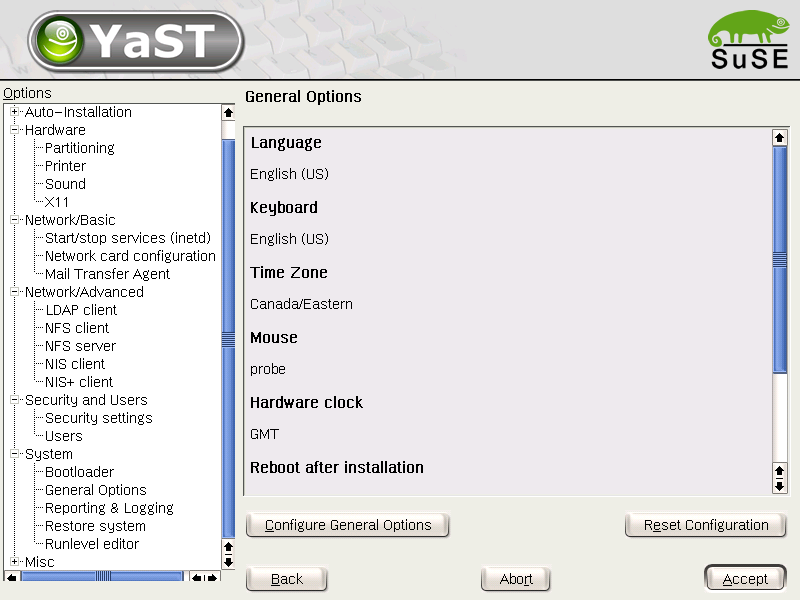
With some exceptions, almost all resources of the control file can be configured using the configuration management system. The system offers you much flexibility and the configuration of some resources are the same available in the YaST2 Control Center. New interfaces were created for special and complex configuration resources, i.e. Partitioning and General options to make it easier for you to access the infromation in an easy and fast way.
Furthermore, using the CMS guarantees that the resulting control file is valid and can be used directly to start an automated installation.
Make sure the configuration system is installed (package autoyast2 and call it using the YaST2 Control Center or call it directly as root with the following command (make sure the DISPLAY variable is set correctly to start the graphical user interface instead of the text based one):
/sbin/yast2 autoyast
|
3.1.1.1. Going through the Configuration Management System
If you intend to create a new configuration, select the respective option from the main screen of the CMS. This will lead you to the File management screen where you can start a new or edit an existing configuration. The files shown on the screen by default are complete configurations which can be used for auto-installation without any change. These files are stored in the main configuration repository. If you are using classes to create you configuration, switch to the Templates view. (Templates are stored in the templates directory beneath the configuration repository.
To start with the configuration, select an existing file using the edit button or start a new configuration by clicking on the new button which will open a pop-up asking for the new file name.
This will lead you directly to the configuration options which can be browsed in any desired order. You can choose to configure only those resources you need.
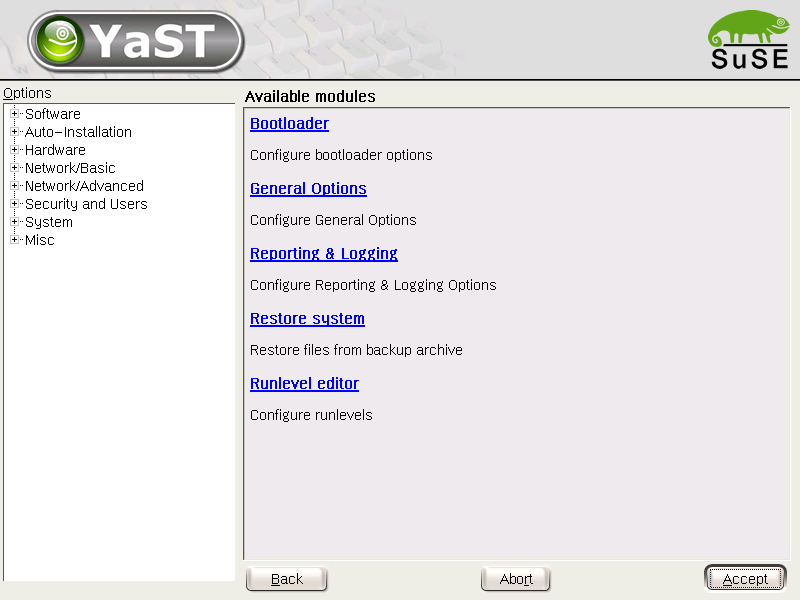
Clicking on a configuration option will show a summary of the current configuration. It is possible to reset a configuration resource at any time. To configure a resource, click on the configure button.
3.1.2. Import of Legacy and Foreign Configuration Files
Using AutoYaST2, you can import ALICE configuration files from previous SuSE releases and foreign auto-installation systems (Kickstart). Please consult the chapter dealing with these issues in this manual.
3.1.3. Using Classes and Templates
3.1.3.1. Classes
Using the configuration management system, you can define a set of classes. The class definition consists of the following variable for each class:
Name: Class name
Descriptions: Class description
Order: Order (or priority) of the class in the stack of migration
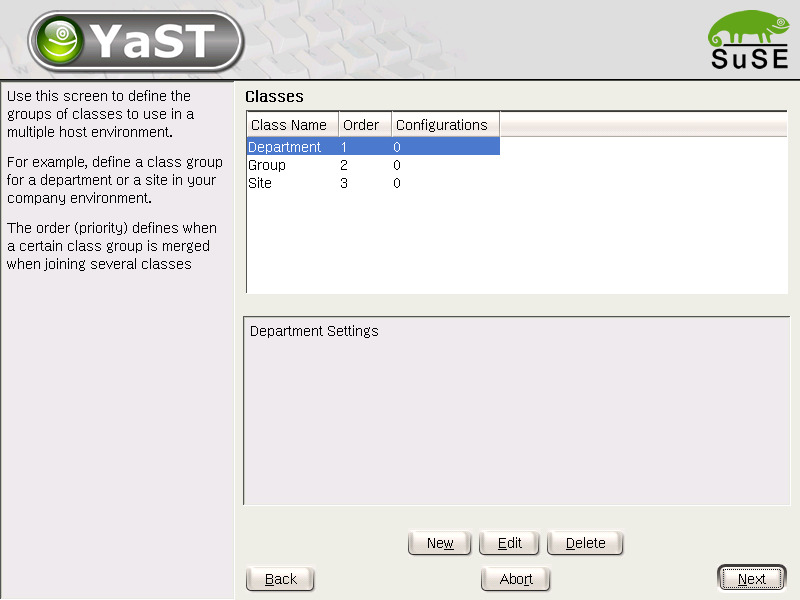
You can create as many classes as required, however it is recommended to keep the set of classes as small as possible to keep the configuration system concise. As an example, the following set of classes can be used:
site: Classes describing a physical location or site.
machine: Classes describing a type of machine or make
role: Classes describing the function of the machine to be installed
group: Classes describing a department or a group within a site or a location.
A file defined in a class can have the same syntax and format as the regular control file and represents a subset of the configuration. For example, to create a new control file for a special computer with a specific network interface, only the resource in the control file, which control the configuration of the network are needed. Having multiple network types, you can merge the one needed for a special type of hardware with other class files and thus, creating a new control file which corosponds to the defined classes.
3.1.3.2. Templates
Templates are control files which are not complete in their content and belong to one or several classes. To make a template installable, it has to run through a merge process which will set all needed values according to the data available in the configurations within the classes.
If you define classes in the control file using the CMS, the file will not be saved in the repository, instead it will be installed in the templates directory in the repository.