1 Installation Quick Start
Abstract#
Use the following procedures to install a new version of openSUSE® Leap 15.0. This document gives a quick overview on how to run through a default installation of openSUSE Leap on the x86_64 architecture.
1.1 Welcome to openSUSE Leap #
For more detailed installation instructions see Chapter 3, Installation Steps.
1.1.1 Minimum System Requirements #
any AMD64/Intel* EM64T processor (32-bit processors are not supported)
1 GB physical RAM (2 GB or more strongly recommended)
10 GB available disk space for a minimal installation, 16 GB for a graphical desktop with Btrfs snapshots (more is recommended)
Supports most modern sound and graphics cards, 1024 x 768 display resolution (higher recommended)
1.1.2 Installing openSUSE Leap #
Use these instructions if there is no existing Linux system on your machine, or if you want to replace an existing Linux system.
1.1.2.1 Booting the Installation System #
Insert the openSUSE Leap DVD into the drive, then reboot the computer to start the installation program. On machines with a traditional BIOS you will see the graphical boot screen shown below. On machines equipped with UEFI, a slightly different boot screen is used. Secure boot on UEFI machines is supported.
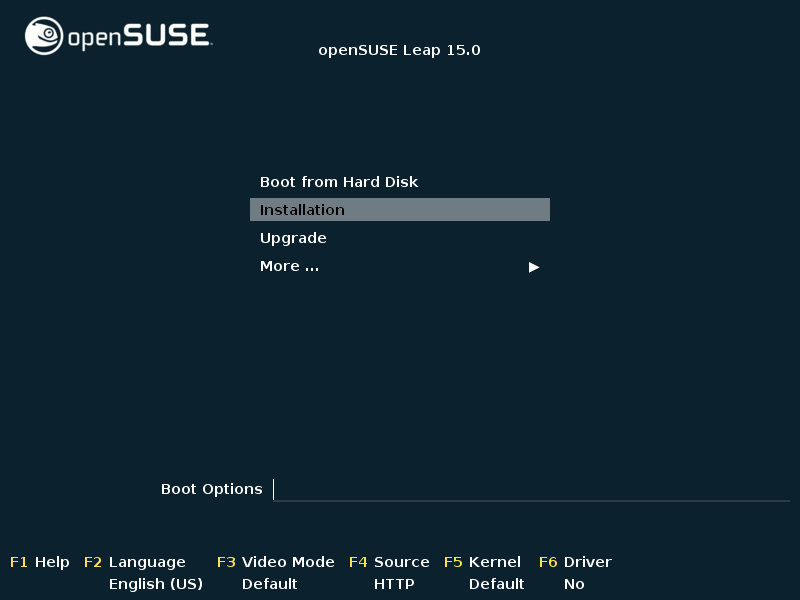
On BIOS machines, use F2 to change the language for the installer. A corresponding keyboard layout is chosen automatically. See Section 2.2.1, “The Boot Screen on Machines Equipped with Traditional BIOS” or Section 2.2.2, “The Boot Screen on Machines Equipped with UEFI” for more information about changing boot parameters. On UEFI machines adjust the language and keyboard settings in the next step.
Select on the boot screen, then press Enter. This boots the system and loads the openSUSE Leap installer.
1.1.2.2 Language, Keyboard and License Agreement #
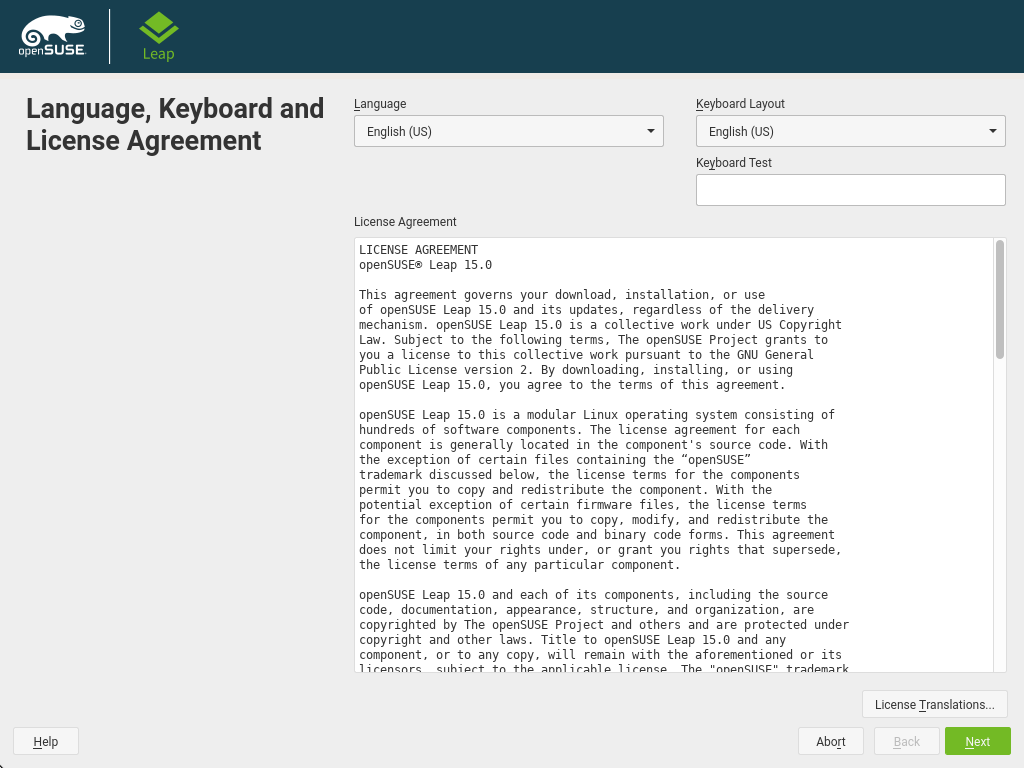
The and settings are initialized with the language you chose on the boot screen. If you did not change the default, it will be English (US). Change the settings here, if necessary. Use the text box to test the layout.
Read the License Agreement. It is presented in the language you have chosen. Other are available. Proceed with .
1.1.2.3 Network Settings #
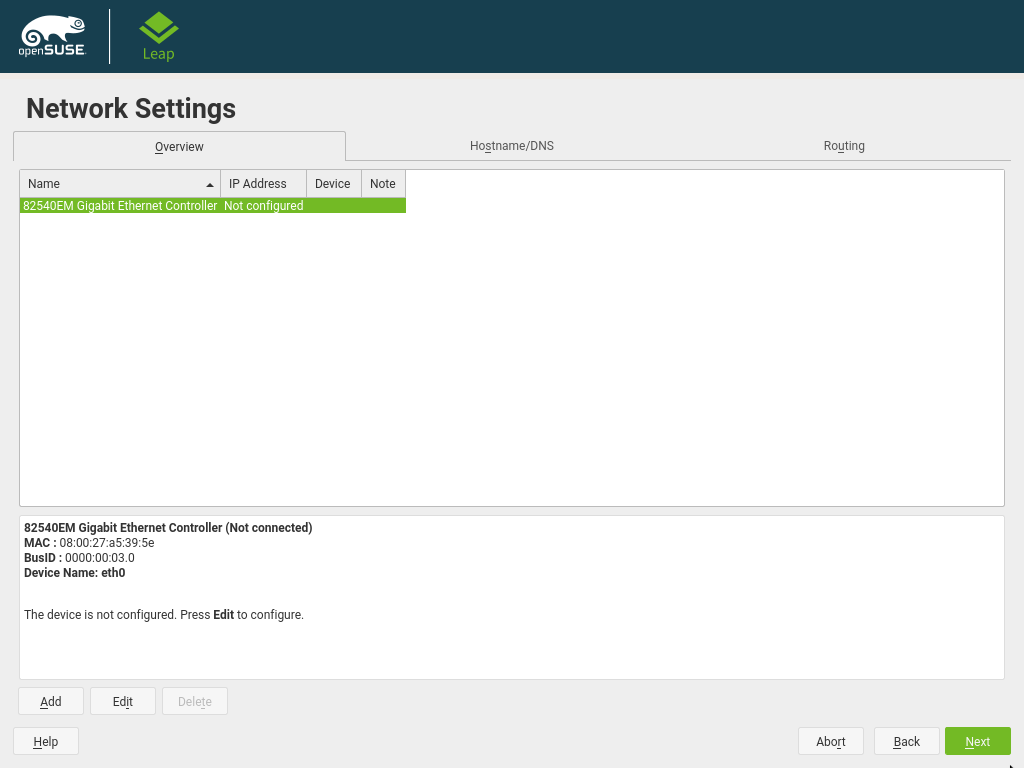
A system analysis is performed, where the installer probes for storage devices, and tries to find other installed systems. If the network was automatically configured via DHCP during the start of the installation, you will be taken to the registration step.
If the network is not yet configured, the dialog opens. Choose a network interface from the list and configure it with . Alternatively, an interface manually. See Section 3.4, “Network Settings” and Book “Reference”, Chapter 13 “Basic Networking”, Section 13.4 “Configuring a Network Connection with YaST” for more information. If you prefer to do an installation without network access, skip this step without making any changes and proceed with .
1.1.2.4 User Interface #
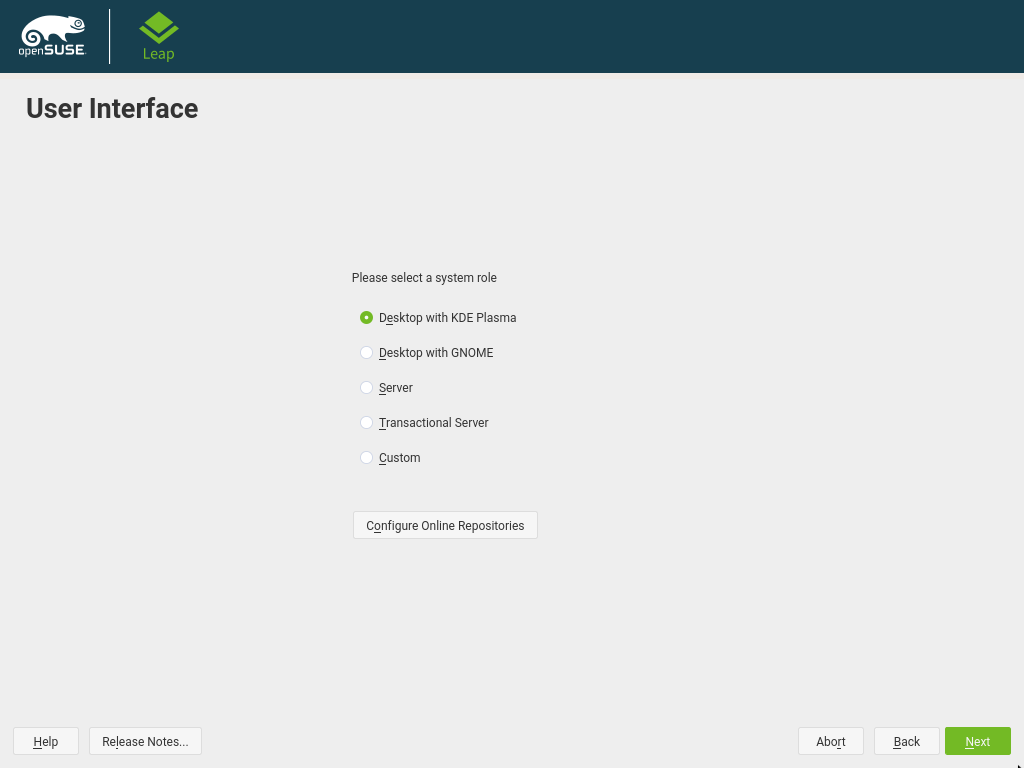
Choose a general software and system configuration with this step by selecting a desktop or server configuration.
For a desktop installation, choose between and . KDE is slightly similar to Windows, GNOME offers an alternative, innovative environment.
If setting up a server, you probably do not need a graphical user interface. Choose in this case. Alternatively, set up a server system with a read-only root partition and transactional updates by choosing . This selection aslo is a prerequisite for setting up openSUSE Kubic. See https://kubic.opensuse.org/blog/2018-04-04-transactionalupdates/ for mor information on transactional updates.
You can also manually choose the software configuration for your system. Select and then to get to the dialog. Choose one or more patterns for installation. By clicking , you can select individual packages.
The dialog also offers the possibility to . Here you can choose to add additional official openSUSE software repositories, offering more software. Using the default selection is recommended. Make sure to add at least the main update repository, because it makes sure the system is installed with latest security patches. You have the following choices:
The contains open source software (OSS). Compared to the DVD installation media, it contains many additional software packages, among them the above mentioned desktop systems. Choose this repository to install them.
The contains security updates and fixes for packages from the and the DVD installation media. Choosing this repository is recommended for all installation scenarios.
The contains packages with a proprietary software license. Choosing it is not required for installing a custom desktop system.
Choosing is recommended when also having chosen the . It contains the respective updates and security fixes.
All other repositories are intended for experienced users and developers. Click on a repository name to get more information.
Confirm your selection with . Depending on your choice, you need to confirm one or more license agreements. Do so by choosing until you return to the screen. Now choose to proceed.
1.1.2.5 Suggested Partitioning #
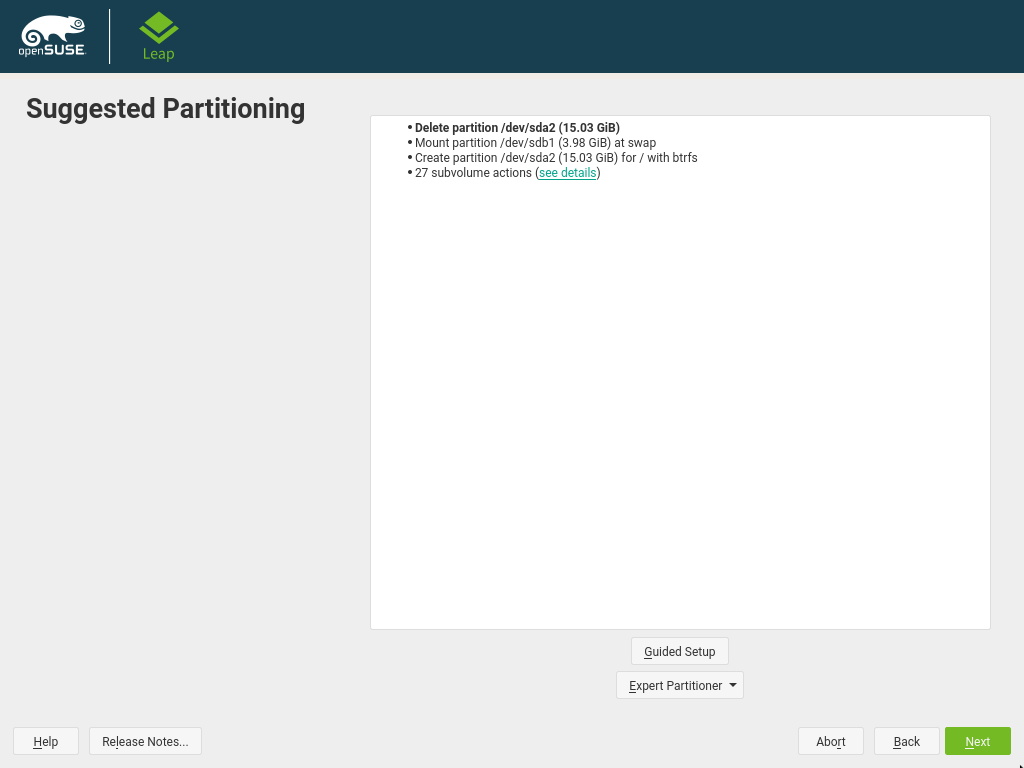
Define a partition setup for openSUSE Leap in this step. Review the partition setup proposed by the system. If necessary, change it. You have the following options:
Starts a wizard which lets you refine the partitioning proposal. Options available here depend on your system setup. In case it contains more than a single hard disk, you may choose which disk(s) to use and where to place the root partition. If the disk(s) already contain partitions, decide whether to remove or resize them.
In subsequent steps you may also add LVM support and disk encryption. You can change the file system for the root partition and decide whether to have a separate home partition or not.
Opens the described in Book “Reference”, Chapter 5 “Expert Partitioner”, Section 5.1 “Using the Expert Partitioner”. This gives you full control over the partitioning setup and lets you create a custom setup. This option is intended for experts.
To accept the proposed setup without any changes, choose to proceed.
Tip: Release Notes
From this point on, the Release Notes can be viewed from any screen during the installation process by selecting .
1.1.2.6 Clock and Time Zone #
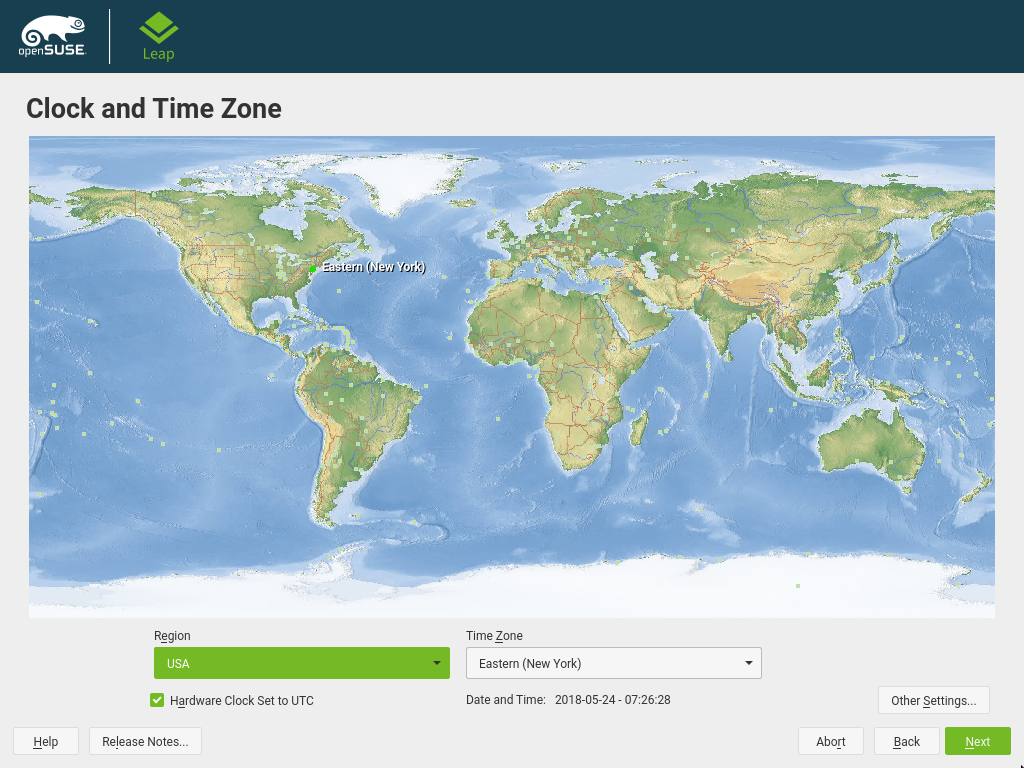
Select the clock and time zone to use in your system. To manually adjust the time or to configure an NTP server for time synchronization, choose . See Section 3.7, “Clock and Time Zone” for detailed information. Proceed with .
1.1.2.7 Local User #
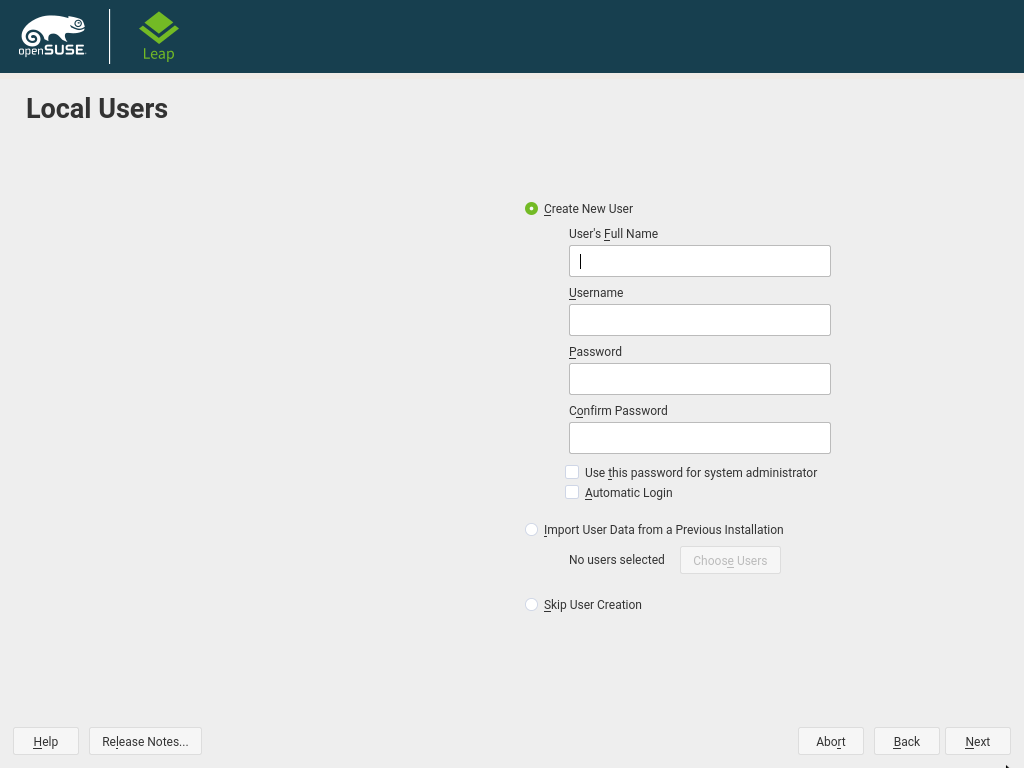
To create a local user, type the first and last name in the field, the login name in the field, and the password in the field.
The password should be at least eight characters long and should contain both uppercase and lowercase letters and numbers. The maximum length for passwords is 72 characters, and passwords are case-sensitive.
For security reasons it is also strongly recommended
not to enable the . You should also not but rather provide a
separate root password in the next installation step.
If you install on a system where a previous Linux installation was found, you may . Click for a list of available user accounts. Select one or more user.
In an environment where users are centrally managed (for example by NIS or LDAP) you may want to skip the creation of local users. Select in this case.
Proceed with .
1.1.2.8 Password for the System Administrator “root” #

Provide a password for the system administrator account (called the
root user).
You should never forget the root password! After you entered it
here, the password cannot be retrieved. See
Section 3.9, “Password for the System Administrator” for more information. Proceed
with .
Tip: Passwords and Keyboard Layout
It is recommended to only use characters that are available on an English keyboard. In case of a system error or when you need to start your system in rescue mode a localized keyboard might not be available.
1.1.2.9 Installation Settings #
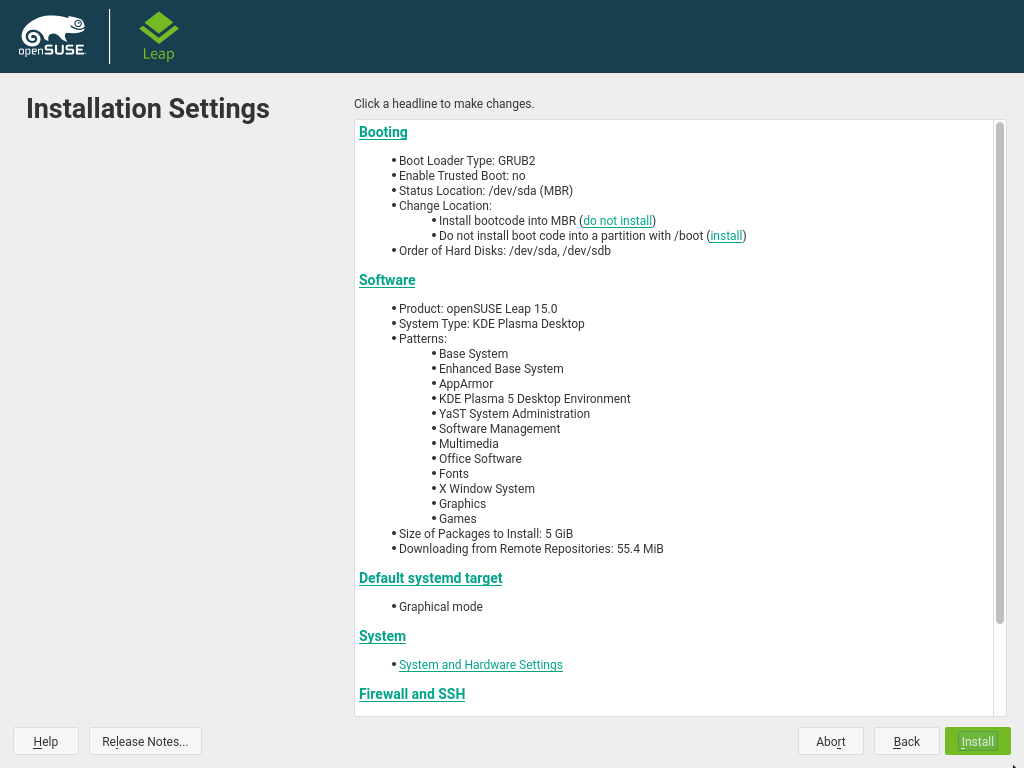
Use the screen to review and—if necessary—change several proposed installation settings. The current configuration is listed for each setting. To change it, click the headline. Some settings, such as firewall or SSH can directly be changed by clicking the respective links.
Tip: Remote System Access
Changes you can make in the , can also be made later at any time from the installed system. However, if you need remote access directly after the installation, you should adjust the settings by opening the SSH port and enabling the SSH server.
This section shows the boot loader configuration. Changing the defaults is only recommended if really needed. Refer to Book “Reference”, Chapter 12 “The Boot Loader GRUB 2” for details.
The default scope of software includes the base system and X Window with the selected desktop. Clicking opens the screen, where you can change the software selection by selecting or deselecting patterns. Each pattern contains several software packages needed for specific functions (for example, Web and LAMP server or a print server). For a more detailed selection based on software packages to install, select to switch to the YaST . See Chapter 10, Installing or Removing Software for more information.
If you have chosen to install a desktop system, the system boots into the target, with network, multiuser and display manager support. If you have not installed a desktop, the system boots into a login shell ().
View detailed hardware information by clicking . In the resulting screen you can also change —see Section 3.10.6, “” for more information.
By default, the Firewall is enabled with all network interfaces configured for the public zone. See Book “Security Guide”, Chapter 16 “Masquerading and Firewalls”, Section 16.4 “
firewalld” for configuration details.The SSH service is disabled by default, its port (22) is closed. Therefore logging in from remote is not possible by default. Click and to toggle these settings.
1.1.2.10 Start the Installation #

After you have finalized the system configuration on the screen, click . Depending on your software selection you may need to agree to license agreements before the installation confirmation screen pops up. Up to this point no changes have been made to your system. After you click a second time, the installation process starts.
1.1.2.11 The Installation Process #
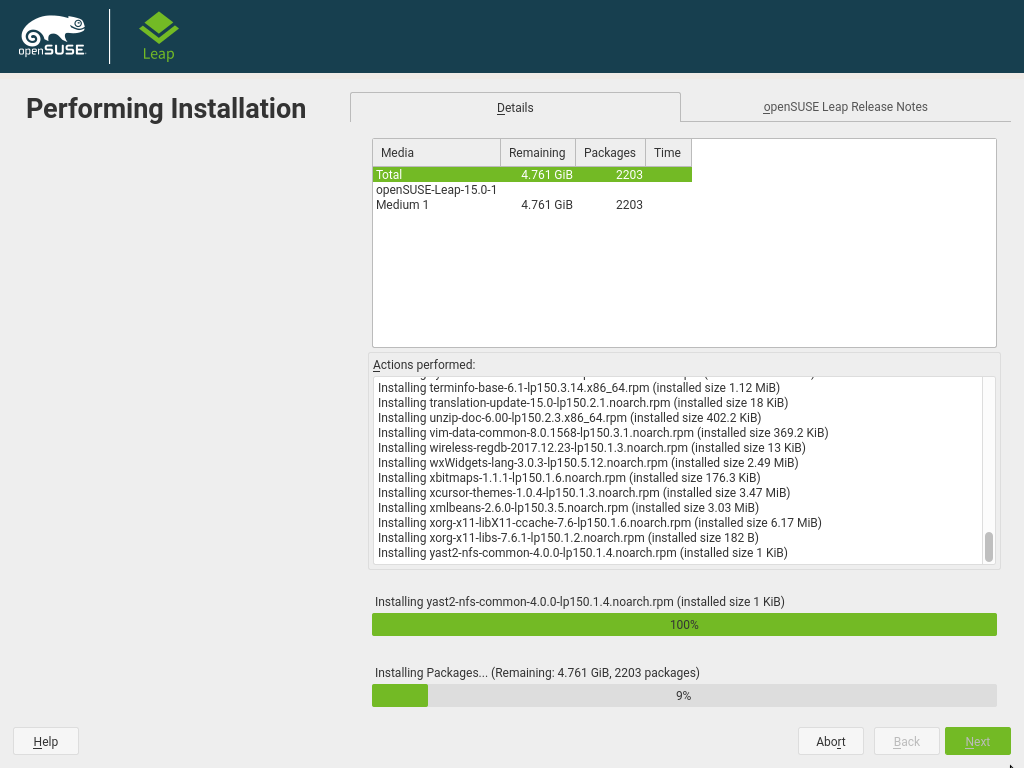
During the installation, the progress is shown in detail on the tab. The tab shows important information; reading them is recommended.
After the installation routine has finished, the computer is rebooted into the installed system. Log in and start YaST to fine-tune the system. If you are not using a graphical desktop or are working from remote, refer to Book “Reference”, Chapter 1 “YaST in Text Mode” for information on using YaST from a terminal.