16 Common Problems and Their Solutions
This chapter describes a range of potential problems and their solutions. Even if your situation is not precisely listed here, there may be one similar enough to offer hints to the solution of your problem.
16.1 Finding and Gathering Information #
Linux reports things in a very detailed way. There are several places to look when you encounter problems with your system, most of which are standard to Linux systems in general, and some are relevant to openSUSE Leap systems. Most log files can be viewed with YaST ( › ).
YaST offers the possibility to collect all system information needed by the support team. Use › and select the problem category. When all information is gathered, attach it to your support request.
A list of the most frequently checked log files follows with the description
of their typical purpose. Paths containing ~ refer to
the current user's home directory.
Table 16.1: Log Files #
|
Log File |
Description |
|---|---|
|
|
Messages from the desktop applications currently running. |
|
|
Log files from AppArmor, see Book “Security Guide” for detailed information. |
|
|
Log file from Audit to track any access to files, directories, or resources of your system, and trace system calls. See Book “Security Guide” for detailed information. |
|
|
Messages from the mail system. |
|
|
Log file from NetworkManager to collect problems with network connectivity |
|
|
Directory containing Samba server and client log messages. |
|
|
All messages from the kernel and system log daemon with the “warning” level or higher. |
|
|
Binary file containing user login records for the current machine
session. View it with |
|
|
Various start-up and runtime log files from the X Window System. It is useful for debugging failed X start-ups. |
|
|
Directory containing YaST's actions and their results. |
|
|
Log file of Zypper. |
Apart from log files, your machine also supplies you with information about
the running system. See
Table 16.2: System Information With the /proc File System
Table 16.2: System Information With the /proc File System #
|
File |
Description |
|---|---|
|
|
Contains processor information, including its type, make, model, and performance. |
|
|
Shows which DMA channels are currently being used. |
|
|
Shows which interrupts are in use, and how many of each have been in use. |
|
|
Displays the status of I/O (input/output) memory. |
|
|
Shows which I/O ports are in use at the moment. |
|
|
Displays memory status. |
|
|
Displays the individual modules. |
|
|
Displays devices currently mounted. |
|
|
Shows the partitioning of all hard disks. |
|
|
Displays the current version of Linux. |
Apart from the /proc file system, the Linux kernel
exports information with the sysfs module, an in-memory
file system. This module represents kernel objects, their attributes and
relationships. For more information about sysfs, see the
context of udev in Book “Reference”, Chapter 16 “Dynamic Kernel Device Management with udev”.
Table 16.3 contains
an overview of the most common directories under /sys.
Table 16.3: System Information With the /sys File System #
|
File |
Description |
|---|---|
|
|
Contains subdirectories for each block device discovered in the system. Generally, these are mostly disk type devices. |
|
|
Contains subdirectories for each physical bus type. |
|
|
Contains subdirectories grouped together as a functional types of devices (like graphics, net, printer, etc.) |
|
|
Contains the global device hierarchy. |
Linux comes with several tools for system analysis and monitoring. See Book “System Analysis and Tuning Guide”, Chapter 2 “System Monitoring Utilities” for a selection of the most important ones used in system diagnostics.
Each of the following scenarios begins with a header describing the problem followed by a paragraph or two offering suggested solutions, available references for more detailed solutions, and cross-references to other scenarios that are related.
16.2 Installation Problems #
Installation problems are situations when a machine fails to install. It may fail entirely or it may not be able to start the graphical installer. This section highlights some typical problems you may run into, and offers possible solutions or workarounds for these kinds of situations.
16.2.1 Checking Media #
If you encounter any problems using the openSUSE Leap installation media, check the integrity of your installation media. Boot from the media and choose from the boot menu. In a running system, start YaST and choose › . To check the openSUSE Leap medium, insert it into the drive and click in the screen of YaST. This may take several minutes. If errors are detected, do not use this medium for installation. Media problems may occur when having burned the medium yourself. Burning the media at a low speed (4x) helps to avoid problems.
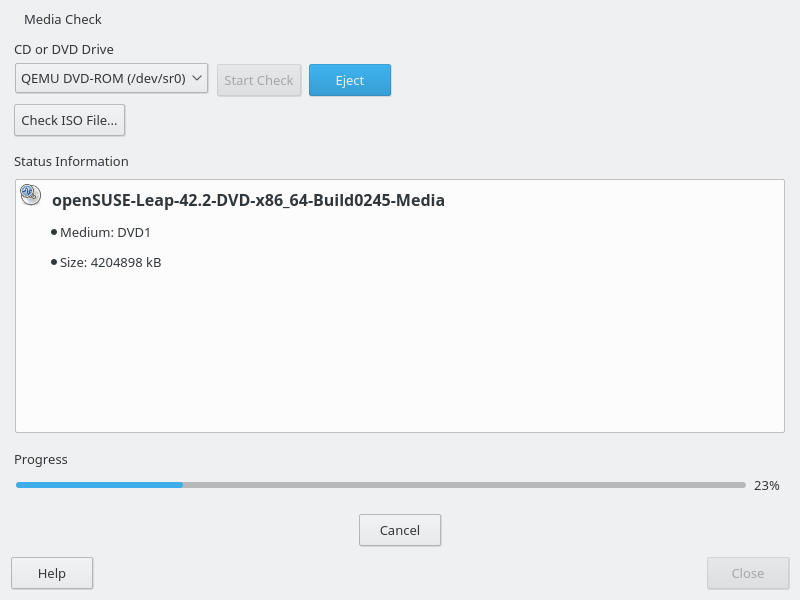
Figure 16.1: Checking Media #
16.2.2 No Bootable DVD Drive Available #
If your computer does not contain a bootable DVD-ROM drive or if the one you have is not supported by Linux, there are several options you can install your machine without a built-in DVD drive:
- Using an External Boot Device
If it is supported by your BIOS and the installation kernel, boot from external DVD drives or USB storage devices. Refer to Section 2.2.1, “PC (AMD64/Intel 64/ARM AArch64): System Start-up” for instructions on how to create a bootable USB storage device.
- Network Boot via PXE
If a machine lacks a DVD drive, but provides a working Ethernet connection, perform a completely network-based installation.
16.2.2.1 External Boot Devices #
Linux supports most existing DVD drives. If the system has no DVD drive, it is still possible that an external DVD drive, connected through USB, FireWire, or SCSI, can be used to boot the system. This depends mainly on the interaction of the BIOS and the hardware used. Sometimes a BIOS update may help if you encounter problems.
When installing from a Live CD, you can also create a “Live flash disk” to boot from.
16.2.3 Booting from Installation Media Fails #
One reason a machine does not boot the installation media can be an incorrect boot sequence setting in BIOS. The BIOS boot sequence must have DVD drive set as the first entry for booting. Otherwise the machine would try to boot from another medium, typically the hard disk. Guidance for changing the BIOS boot sequence can be found the documentation provided with your mainboard, or in the following paragraphs.
The BIOS is the software that enables the very basic functions of a computer. Motherboard vendors provide a BIOS specifically made for their hardware. Normally, the BIOS setup can only be accessed at a specific time—when the machine is booting. During this initialization phase, the machine performs several diagnostic hardware tests. One of them is a memory check, indicated by a memory counter. When the counter appears, look for a line, usually below the counter or somewhere at the bottom, mentioning the key to press to access the BIOS setup. Usually the key to press is one of Del, F1, or Esc. Press this key until the BIOS setup screen appears.
Procedure 16.1: Changing the BIOS Boot Sequence #
Enter the BIOS using the proper key as announced by the boot routines and wait for the BIOS screen to appear.
To change the boot sequence in an AWARD BIOS, look for the entry. Other manufacturers may have a different name for this, such as . When you have found the entry, select it and confirm with Enter.
In the screen that opens, look for a subentry called or . Change the settings by pressing Page ↑ or Page ↓ until the DVD drive is listed first.
Leave the BIOS setup screen by pressing Esc. To save the changes, select , or press F10. To confirm that your settings should be saved, press Y.
Procedure 16.2: Changing the Boot Sequence in an SCSI BIOS (Adaptec Host Adapter) #
Open the setup by pressing Ctrl–A.
Select . The connected hardware components are now displayed.
Make note of the SCSI ID of your DVD drive.
Exit the menu with Esc.
Open . Under , select and press Enter.
Enter the ID of the DVD drive and press Enter again.
Press Esc twice to return to the start screen of the SCSI BIOS.
Exit this screen and confirm with to boot the computer.
Regardless of what language and keyboard layout your final installation will be using, most BIOS configurations use the US keyboard layout as depicted in the following figure:
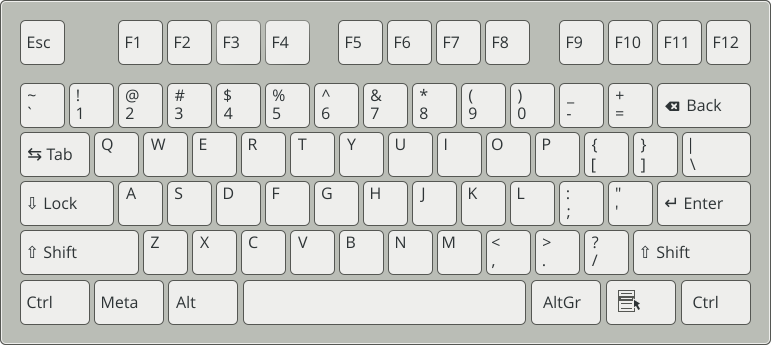
Figure 16.2: US Keyboard Layout #
16.2.4 Fails to Boot #
Some hardware types, mainly very old or very recent ones, fail to install. Often this may happen because support for this type of hardware is missing in the installation kernel, or because of certain functionality included in this kernel, such as ACPI, that can still cause problems on some hardware.
If your system fails to install using the standard mode from the first installation boot screen, try the following:
With the DVD still in the drive, reboot the machine with Ctrl–Alt–Del or using the hardware reset button.
When the boot screen appears, press F5, use the arrow keys of your keyboard to navigate to and press Enter to launch the boot and installation process. This option disables the support for ACPI power management techniques.
Proceed with the installation as described in Chapter 2, Installation with YaST.
If this fails, proceed as above, but choose instead. This option disables ACPI and DMA support. Most hardware will boot with this option.
If both of these options fail, use the boot options prompt to pass any
additional parameters needed to support this type of hardware to the
installation kernel. For more information about the parameters available as
boot options, refer to the kernel documentation located in
/usr/src/linux/Documentation/kernel-parameters.txt.
Tip: Obtaining Kernel Documentation
Install the kernel-source
package to view the kernel documentation.
There are various other ACPI-related kernel parameters that can be entered at the boot prompt prior to booting for installation:
acpi=offThis parameter disables the complete ACPI subsystem on your computer. This may be useful if your computer cannot handle ACPI or if you think ACPI in your computer causes trouble.
acpi=forceAlways enable ACPI even if your computer has an old BIOS dated before the year 2000. This parameter also enables ACPI if it is set in addition to
acpi=off.acpi=noirqDo not use ACPI for IRQ routing.
acpi=htRun only enough ACPI to enable hyper-threading.
acpi=strictBe less tolerant of platforms that are not strictly ACPI specification compliant.
pci=noacpiDisable PCI IRQ routing of the new ACPI system.
pnpacpi=offThis option is for serial or parallel problems when your BIOS setup contains wrong interrupts or ports.
notscDisable the time stamp counter. This option can be used to work around timing problems on your systems. It is a recent feature, if you see regressions on your machine, especially time related or even total hangs, this option is worth a try.
nohz=offDisable the nohz feature. If your machine hangs, this option may help. Otherwise it is of no use.
Once you have determined the right parameter combination, YaST automatically writes them to the boot loader configuration to make sure that the system boots properly next time.
If unexplainable errors occur when the kernel is loaded or during the installation, select in the boot menu to check the memory. If returns an error, it is usually a hardware error.
16.2.5 Fails to Launch Graphical Installer #
After you insert the medium into your drive and reboot your machine, the installation screen comes up, but after you select , the graphical installer does not start.
There are several ways to deal with this situation:
Try to select another screen resolution for the installation dialogs.
Select for installation.
Do a remote installation via VNC using the graphical installer.
Procedure 16.3: Change Screen Resolution for Installation #
Boot for installation.
Press F3 to open a menu from which to select a lower resolution for installation purposes.
Select and proceed with the installation as described in Chapter 2, Installation with YaST.
Procedure 16.4: Installation in Text Mode #
Boot for installation.
Press F3 and select .
Select and proceed with the installation as described in Chapter 2, Installation with YaST.
Procedure 16.5: VNC Installation #
Boot for installation.
Enter the following text at the boot options prompt:
vnc=1 vncpassword=some_password
Replace some_password with the password to use for VNC installation.
Select then press Enter to start the installation.
Instead of starting right into the graphical installation routine, the system continues to run in a text mode, then halts, displaying a message containing the IP address and port number at which the installer can be reached via a browser interface or a VNC viewer application.
If using a browser to access the installer, launch the browser and enter the address information provided by the installation routines on the future openSUSE Leap machine and press Enter:
http://ip_address_of_machine:5801
A dialog opens in the browser window prompting you for the VNC password. Enter it and proceed with the installation as described in Chapter 2, Installation with YaST.

Important: Cross-platform Support
Installation via VNC works with any browser under any operating system, provided Java support is enabled.
Provide the IP address and password to your VNC viewer when prompted. A window opens, displaying the installation dialogs. Proceed with the installation as usual.
16.2.6 Only Minimalistic Boot Screen Started #
You inserted the medium into the drive, the BIOS routines are finished, but the system does not start with the graphical boot screen. Instead it launches a very minimalistic text-based interface. This may happen on any machine not providing sufficient graphics memory for rendering a graphical boot screen.
Although the text boot screen looks minimalistic, it provides nearly the same functionality as the graphical one:
- Boot Options
Unlike the graphical interface, the different boot options cannot be selected using the cursor keys of your keyboard. The boot menu of the text mode boot screen offers some keywords to enter at the boot prompt. These keywords map to the options offered in the graphical version. Enter your choice and press Enter to launch the boot process.
- Custom Boot Options
After selecting a boot option, enter the appropriate keyword at the boot prompt or enter some custom boot options as described in Section 16.2.4, “Fails to Boot”. To launch the installation process, press Enter.
- Screen Resolutions
Use the F keys to determine the screen resolution for installation. If you need to boot in text mode, choose F3.
16.3 Boot Problems #
Boot problems are situations when your system does not boot properly (does not boot to the expected target and login screen).
16.3.1 The GRUB 2 Boot Loader Fails to Load #
If the hardware is functioning properly, it is possible that the boot loader is corrupted and Linux cannot start on the machine. In this case, it is necessary to repair the boot loader. To do so, you need to start the Rescue System as described in Section 16.6.2, “Using the Rescue System” and follow the instructions in Section 16.6.2.4, “Modifying and Re-installing the Boot Loader”.
Alternatively, you can use the Rescue System to fix the boot loader as follows. Boot your machine from the installation media. In the boot screen, choose › . Select the disk containinig the installed system and kernel with the default kernel options.
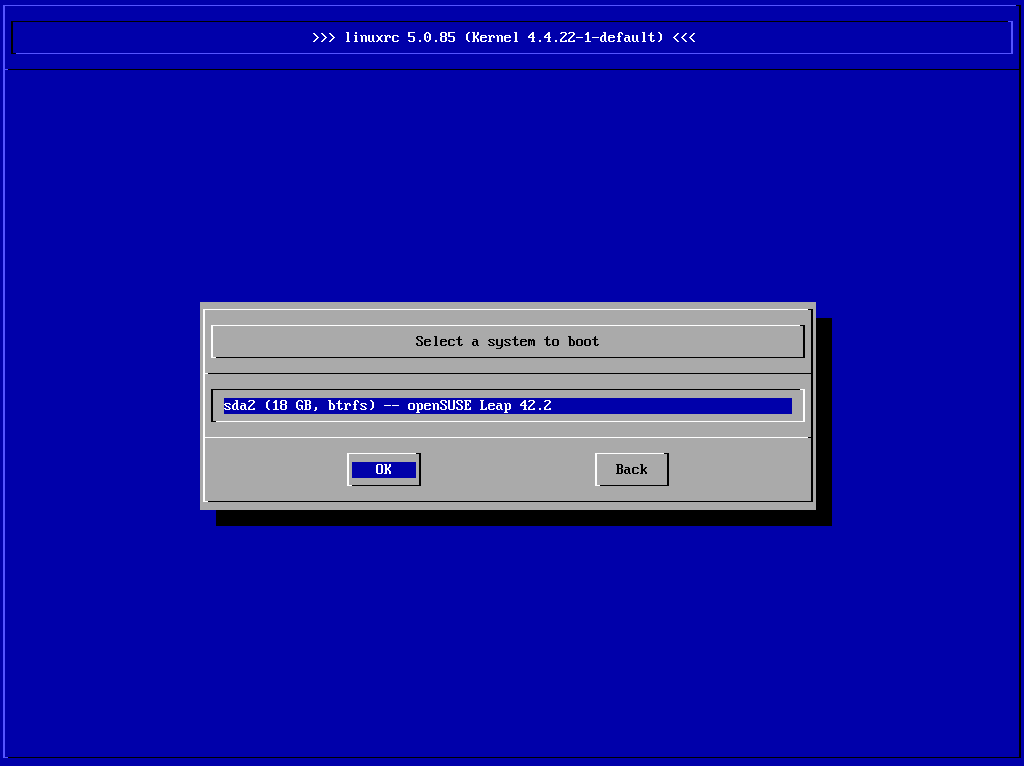
Figure 16.3: Select Disk #
When the system is booted, start YaST and switch to › . Make sure that the option is enabled, and press . This fixes the corrupted boot loader by overwriting it, or installs the boot loader if it's missing.
Other reasons for the machine not booting may be BIOS-related:
- BIOS Settings
Check your BIOS for references to your hard disk. GRUB 2 may simply not be started if the hard disk itself cannot be found with the current BIOS settings.
- BIOS Boot Order
Check whether your system's boot order includes the hard disk. If the hard disk option was not enabled, your system may install properly, but fails to boot when access to the hard disk is required.
16.3.2 No Login or Prompt Appears #
This behavior typically occurs after a failed kernel upgrade and it is known as a kernel panic because of the type of error on the system console that sometimes can be seen at the final stage of the process. If, in fact, the machine has just been rebooted following a software update, the immediate goal is to reboot it using the old, proven version of the Linux kernel and associated files. This can be done in the GRUB 2 boot loader screen during the boot process as follows:
Reboot the computer using the reset button, or switch it off and on again.
When the GRUB 2 boot screen becomes visible, select the entry and choose the previous kernel from the menu. The machine will boot using the prior version of the kernel and its associated files.
After the boot process has completed, remove the newly installed kernel and, if necessary, set the default boot entry to the old kernel using the YaST module. For more information refer to Book “Reference”, Chapter 12 “The Boot Loader GRUB 2”, Section 12.3 “Configuring the Boot Loader with YaST”. However, doing this is probably not necessary because automated update tools normally modify it for you during the rollback process.
Reboot.
If this does not fix the problem, boot the computer using the installation media. After the machine has booted, continue with Step 3.
16.3.3 No Graphical Login #
If the machine comes up, but does not boot into the graphical login
manager, anticipate problems either with the choice of the default systemd
target or the configuration of the X Window System. To check the current
systemd default target run the command sudo systemctl
get-default. If the value returned is not
graphical.target, run the command sudo
systemctl isolate graphical.target. If the graphical login screen
starts, log in and start › ›
and set the to . From now on the system should boot into the graphical
login screen.
If the graphical login screen does not start even if having booted or
switched to the graphical target, your desktop or X Window software is
probably misconfigured or corrupted. Examine the log files at
/var/log/Xorg.*.log for detailed messages from the X
server as it attempted to start. If the desktop fails during start, it may
log error messages to the system journal that can be queried with the
command journalctl (see Book “Reference”, Chapter 11 “journalctl: Query the systemd Journal”
for more information). If these error messages hint at a configuration
problem in the X server, try to fix these issues. If the graphical system
still does not come up, consider reinstalling the graphical desktop.
16.3.4 Root Btrfs Partition Cannot Be Mounted #
If a btrfs root partition
becomes corrupted, try the following options:
Mount the partition with the
-o recoveryoption.If that fails, run
btrfs-zero-logon your root partition.
16.3.5 Force Checking Root Partitions #
If the root partition becomes corrupted, use the parameter
forcefsck on the boot prompt. This passes the option
-f (force) to the fsck command.
16.4 Login Problems #
Login problems are those where your machine does, in fact, boot to the expected welcome screen or login prompt, but refuses to accept the user name and password, or accepts them but then does not behave properly (fails to start the graphic desktop, produces errors, drops to a command line, etc.).
16.4.1 Valid User Name and Password Combinations Fail #
This usually occurs when the system is configured to use network
authentication or directory services and, for some reason, cannot retrieve
results from its configured servers. The
root user, as the only local
user, is the only user that can still log in to these machines. The
following are some common reasons a machine appears functional but cannot
process logins correctly:
The network is not working. For further directions on this, turn to Section 16.5, “Network Problems”.
DNS is not working at the moment (which prevents GNOME from working and the system from making validated requests to secure servers). One indication that this is the case is that the machine takes an extremely long time to respond to any action. Find more information about this topic in Section 16.5, “Network Problems”.
If the system is configured to use Kerberos, the system's local time may have drifted past the accepted variance with the Kerberos server time (this is typically 300 seconds). If NTP (network time protocol) is not working properly or local NTP servers are not working, Kerberos authentication ceases to function because it depends on common clock synchronization across the network.
The system's authentication configuration is misconfigured. Check the PAM configuration files involved for any typographical errors or misordering of directives. For additional background information about PAM and the syntax of the configuration files involved, refer to Book “Security Guide”, Chapter 2 “Authentication with PAM”.
The home partition is encrypted. Find more information about this topic in Section 16.4.3, “Login to Encrypted Home Partition Fails”.
In all cases that do not involve external network problems, the solution is to reboot the system into single-user mode and repair the configuration before booting again into operating mode and attempting to log in again. To boot into single-user mode:
Reboot the system. The boot screen appears, offering a prompt.
Press Esc to exit the splash screen and get to the GRUB 2 text-based menu.
Press B to enter the GRUB 2 editor.
Add the following parameter to the line containing the Kernel parameters:
systemd.unit=rescue.target
Press F10.
Enter the user name and password for
root.Make all the necessary changes.
Boot into the full multiuser and network mode by entering
systemctl isolate graphical.targetat the command line.
16.4.2 Valid User Name and Password Not Accepted #
This is by far the most common problem users encounter, because there are many reasons this can occur. Depending on whether you use local user management and authentication or network authentication, login failures occur for different reasons.
Local user management can fail for the following reasons:
The user may have entered the wrong password.
The user's home directory containing the desktop configuration files is corrupted or write protected.
There may be problems with the X Window System authenticating this particular user, especially if the user's home directory has been used with another Linux distribution prior to installing the current one.
To locate the reason for a local login failure, proceed as follows:
Check whether the user remembered his password correctly before you start debugging the whole authentication mechanism. If the user may not remember his password correctly, use the YaST User Management module to change the user's password. Pay attention to the Caps Lock key and unlock it, if necessary.
Log in as
rootand check the system journal withjournalctl -efor error messages of the login process and of PAM.Try to log in from a console (using Ctrl–Alt–F1). If this is successful, the blame cannot be put on PAM, because it is possible to authenticate this user on this machine. Try to locate any problems with the X Window System or the GNOME desktop. For more information, refer to Section 16.4.4, “Login Successful but GNOME Desktop Fails”.
If the user's home directory has been used with another Linux distribution, remove the
Xauthorityfile in the user's home. Use a console login via Ctrl–Alt–F1 and runrm .Xauthorityas this user. This should eliminate X authentication problems for this user. Try graphical login again.If the desktop could not start because of corrupt configuration files, proceed with Section 16.4.4, “Login Successful but GNOME Desktop Fails”.
In the following, common reasons a network authentication for a particular user may fail on a specific machine are listed:
The user may have entered the wrong password.
The user name exists in the machine's local authentication files and is also provided by a network authentication system, causing conflicts.
The home directory exists but is corrupt or unavailable. Perhaps it is write protected or is on a server that is inaccessible at the moment.
The user does not have permission to log in to that particular host in the authentication system.
The machine has changed host names, for whatever reason, and the user does not have permission to log in to that host.
The machine cannot reach the authentication server or directory server that contains that user's information.
There may be problems with the X Window System authenticating this particular user, especially if the user's home has been used with another Linux distribution prior to installing the current one.
To locate the cause of the login failures with network authentication, proceed as follows:
Check whether the user remembered their password correctly before you start debugging the whole authentication mechanism.
Determine the directory server which the machine relies on for authentication and make sure that it is up and running and properly communicating with the other machines.
Determine that the user's user name and password work on other machines to make sure that his authentication data exists and is properly distributed.
See if another user can log in to the misbehaving machine. If another user can log in without difficulty or if
rootcan log in, log in and examine the system journal withjournalctl -e> file. Locate the time stamps that correspond to the login attempts and determine if PAM has produced any error messages.Try to log in from a console (using Ctrl–Alt–F1). If this is successful, the problem is not with PAM or the directory server on which the user's home is hosted, because it is possible to authenticate this user on this machine. Try to locate any problems with the X Window System or the GNOME desktop. For more information, refer to Section 16.4.4, “Login Successful but GNOME Desktop Fails”.
If the user's home directory has been used with another Linux distribution, remove the
Xauthorityfile in the user's home. Use a console login via Ctrl–Alt–F1 and runrm .Xauthorityas this user. This should eliminate X authentication problems for this user. Try graphical login again.If the desktop could not start because of corrupt configuration files, proceed with Section 16.4.4, “Login Successful but GNOME Desktop Fails”.
16.4.3 Login to Encrypted Home Partition Fails #
It is recommended to use an encrypted home partition for laptops. If you cannot log in to your laptop, the reason is usually simple: your partition could not be unlocked.
During the boot time, you need to enter the passphrase to unlock your encrypted partition. If you do not enter it, the boot process continues, leaving the partition locked.
To unlock your encrypted partition, proceed as follows:
Switch to the text console with Ctrl–Alt–F1.
Become
root.Restart the unlocking process again with:
systemctl restart home.mount
Enter your passphrase to unlock your encrypted partition.
Exit the text console and switch back to the login screen with Alt–F7.
Log in as usual.
16.4.4 Login Successful but GNOME Desktop Fails #
If this is the case, it is likely that your GNOME configuration files have become corrupted. Some symptoms may include the keyboard failing to work, the screen geometry becoming distorted, or even the screen coming up as a bare gray field. The important distinction is that if another user logs in, the machine works normally. It is then likely that the problem can be fixed relatively quickly by simply moving the user's GNOME configuration directory to a new location, which causes GNOME to initialize a new one. Although the user is forced to reconfigure GNOME, no data is lost.
Switch to a text console by pressing Ctrl–Alt–F1.
Log in with your user name.
Move the user's GNOME configuration directories to a temporary location:
mv .gconf  .gconf-ORIG-RECOVER
mv .gnome2 .gnome2-ORIG-RECOVER
Log out.
Log in again, but do not run any applications.
Recover your individual application configuration data (including the Evolution e-mail client data) by copying the
~/.gconf-ORIG-RECOVER/apps/directory back into the new~/.gconfdirectory as follows:cp -a .gconf-ORIG-RECOVER/apps .gconf/
If this causes the login problems, attempt to recover only the critical application data and reconfigure the remainder of the applications.
16.5 Network Problems #
Many problems of your system may be network-related, even though they do not seem to be at first. For example, the reason for a system not allowing users to log in may be a network problem of some kind. This section introduces a simple checklist you can apply to identify the cause of any network problem encountered.
Procedure 16.6: How to Identify Network Problems #
When checking the network connection of your machine, proceed as follows:
If you use an Ethernet connection, check the hardware first. Make sure that your network cable is properly plugged into your computer and router (or hub, etc.). The control lights next to your Ethernet connector are normally both be active.
If the connection fails, check whether your network cable works with another machine. If it does, your network card causes the failure. If hubs or switches are included in your network setup, they may be faulty, as well.
If using a wireless connection, check whether the wireless link can be established by other machines. If not, contact the wireless network's administrator.
Once you have checked your basic network connectivity, try to find out which service is not responding. Gather the address information of all network servers needed in your setup. Either look them up in the appropriate YaST module or ask your system administrator. The following list gives some typical network servers involved in a setup together with the symptoms of an outage.
- DNS (Name Service)
A broken or malfunctioning name service affects the network's functionality in many ways. If the local machine relies on any network servers for authentication and these servers cannot be found because of name resolution issues, users would not even be able to log in. Machines in the network managed by a broken name server would not be able to “see” each other and communicate.
- NTP (Time Service)
A malfunctioning or completely broken NTP service could affect Kerberos authentication and X server functionality.
- NFS (File Service)
If any application needs data stored in an NFS mounted directory, it cannot start or function properly if this service was down or misconfigured. In the worst case scenario, a user's personal desktop configuration would not come up if their home directory containing the
.gconfsubdirectory could not be found because of a faulty NFS server.- Samba (File Service)
If any application needs data stored in a directory on a faulty Samba server, it cannot start or function properly.
- NIS (User Management)
If your openSUSE Leap system relies on a faulty NIS server to provide the user data, users cannot log in to this machine.
- LDAP (User Management)
If your openSUSE Leap system relies on a faulty LDAP server to provide the user data, users cannot log in to this machine.
- Kerberos (Authentication)
Authentication will not work and login to any machine fails.
- CUPS (Network Printing)
Users cannot print.
Check whether the network servers are running and whether your network setup allows you to establish a connection:
Important: Limitations
The debugging procedure described below only applies to a simple network server/client setup that does not involve any internal routing. It assumes both server and client are members of the same subnet without the need for additional routing.
Use
pingIP address or host name (replace host name with the host name of the server) to check whether each one of them is up and responding to the network. If this command is successful, it tells you that the host you were looking for is up and running and that the name service for your network is configured correctly.If ping fails with
destination host unreachable, either your system or the desired server is not properly configured or down. Check whether your system is reachable by runningpingIP address or your_host_name from another machine. If you can reach your machine from another machine, it is the server that is not running or not configured correctly.If ping fails with
unknown host, the name service is not configured correctly or the host name used was incorrect. For further checks on this matter, refer to Step 4.b. If ping still fails, either your network card is not configured correctly or your network hardware is faulty.Use
hosthost name to check whether the host name of the server you are trying to connect to is properly translated into an IP address and vice versa. If this command returns the IP address of this host, the name service is up and running. If thehostcommand fails, check all network configuration files relating to name and address resolution on your host:/etc/resolv.confThis file is used to keep track of the name server and domain you are currently using. It can be modified manually or automatically adjusted by YaST or DHCP. Automatic adjustment is preferable. However, make sure that this file has the following structure and all network addresses and domain names are correct:
search fully_qualified_domain_name
nameserver ipaddress_of_nameserver
This file can contain more than one name server address, but at least one of them must be correct to provide name resolution to your host. If needed, adjust this file using the YaST Network Setting module (Hostname/DNS tab).
If your network connection is handled via DHCP, enable DHCP to change host name and name service information by selecting and in the YaST DNS and Hostname module.
/etc/nsswitch.confThis file tells Linux where to look for name service information. It should look like this:
 ...
hosts: files dns
networks: files dns
...
The
dnsentry is vital. It tells Linux to use an external name server. Normally, these entries are automatically managed by YaST, but it would be prudent to check.If all the relevant entries on the host are correct, let your system administrator check the DNS server configuration for the correct zone information. For detailed information about DNS, refer to Book “Reference”, Chapter 19 “The Domain Name System”. If you have made sure that the DNS configuration of your host and the DNS server are correct, proceed with checking the configuration of your network and network device.
If your system cannot establish a connection to a network server and you have excluded name service problems from the list of possible culprits, check the configuration of your network card.
Use the command
ip addr shownetwork_device to check whether this device was properly configured. Make sure that theinet addresswith the netmask (/mask) is configured correctly. An error in the IP address or a missing bit in your network mask would render your network configuration unusable. If necessary, perform this check on the server as well.If the name service and network hardware are properly configured and running, but some external network connections still get long time-outs or fail entirely, use
traceroutefully_qualified_domain_name (executed asroot) to track the network route these requests are taking. This command lists any gateway (hop) that a request from your machine passes on its way to its destination. It lists the response time of each hop and whether this hop is reachable. Use a combination of traceroute and ping to track down the culprit and let the administrators know.
Once you have identified the cause of your network trouble, you can resolve it yourself (if the problem is located on your machine) or let the system administrators of your network know about your findings so they can reconfigure the services or repair the necessary systems.
16.5.1 NetworkManager Problems #
If you have a problem with network connectivity, narrow it down as described in Procedure 16.6, “How to Identify Network Problems”. If NetworkManager seems to be the culprit, proceed as follows to get logs providing hints on why NetworkManager fails:
Open a shell and log in as
root.Restart the NetworkManager:
systemctl restart Network.Manager
Open a Web page, for example, http://www.opensuse.org as normal user to see, if you can connect.
Collect any information about the state of NetworkManager in
/var/log/NetworkManager.
For more information about NetworkManager, refer to Book “Reference”, Chapter 28 “Using NetworkManager”.
16.6 Data Problems #
Data problems are when the machine may or may not boot properly but, in either case, it is clear that there is data corruption on the system and that the system needs to be recovered. These situations call for a backup of your critical data, enabling you to recover the system state from before your system failed. openSUSE Leap offers dedicated YaST modules for system backup and restoration and a rescue system that can be used to recover a corrupted system from the outside.
16.6.1 Managing Partition Images #
Sometimes you need to perform a backup from an entire partition or even
hard disk. Linux comes with the dd tool which can create
an exact copy of your disk. Combined with gzip you save
some space.
Procedure 16.7: Backing up and Restoring Hard Disks #
Start a Shell as user
root.Select your source device. Typically this is something like
/dev/sda(labeled as SOURCE).Decide where you want to store your image (labeled as BACKUP_PATH). It must be different from your source device. In other words: if you make a backup from
/dev/sda, your image file must not to be stored under/dev/sda.Run the commands to create a compressed image file:
dd if=/dev/SOURCE | gzip > /BACKUP_PATH/image.gz
Restore the hard disk with the following commands:
gzip -dc /BACKUP_PATH/image.gz | dd of=/dev/SOURCE
If you only need to back up a partition, replace the SOURCE placeholder with your respective partition. In this case, your image file can lie on the same hard disk, but on a different partition.
16.6.2 Using the Rescue System #
There are several reasons a system could fail to come up and run properly. A corrupted file system following a system crash, corrupted configuration files, or a corrupted boot loader configuration are the most common ones.
To help you to resolve these situations, openSUSE Leap contains a rescue system that you can boot. The rescue system is a small Linux system that can be loaded into a RAM disk and mounted as root file system, allowing you to access your Linux partitions from the outside. Using the rescue system, you can recover or modify any important aspect of your system.
Manipulate any type of configuration file.
Check the file system for defects and start automatic repair processes.
Access the installed system in a “change root” environment.
Check, modify, and re-install the boot loader configuration.
Recover from a badly installed device driver or unusable kernel.
Resize partitions using the parted command. Find more information about this tool at the GNU Parted Web site http://www.gnu.org/software/parted/parted.html.
The rescue system can be loaded from various sources and locations. The simplest option is to boot the rescue system from the original installation medium.
If your hardware setup does not include a DVD drive, you can boot the rescue
system from a network source. The following example applies to a remote boot
scenario—if using another boot medium, such as a DVD, modify the
info file accordingly and boot as you would for a
normal installation.
Enter the configuration of your PXE boot setup and add the lines
install=protocol://instsourceandrescue=1. If you need to start the repair system, userepair=1instead. As with a normal installation, protocol stands for any of the supported network protocols (NFS, HTTP, FTP, etc.) and instsource for the path to your network installation source.Boot the system using “Wake on LAN”.
Enter
rootat theRescue:prompt. A password is not required.
Once you have entered the rescue system, you can use the virtual consoles that can be reached with Alt–F1 to Alt–F6.
A shell and many other useful utilities, such as the mount program, are
available in the /bin directory. The
/sbin directory contains important file and network
utilities for reviewing and repairing the file system. This directory also
contains the most important binaries for system maintenance, such as
fdisk, mkfs, mkswap,
mount, and shutdown,
ip and ss for maintaining the network.
The directory /usr/bin contains the vi editor, find,
less, and SSH.
To see the system messages, either use the command dmesg
or view the system log with journalctl.
16.6.2.1 Checking and Manipulating Configuration Files #
As an example for a configuration that might be fixed using the rescue system, imagine you have a broken configuration file that prevents the system from booting properly. You can fix this using the rescue system.
To manipulate a configuration file, proceed as follows:
Start the rescue system using one of the methods described above.
To mount a root file system located under
/dev/sda6to the rescue system, use the following command:mount /dev/sda6 /mnt
All directories of the system are now located under
/mntChange the directory to the mounted root file system:
cd /mnt
Open the problematic configuration file in the vi editor. Adjust and save the configuration.
Unmount the root file system from the rescue system:
umount /mnt
Reboot the machine.
16.6.2.2 Repairing and Checking File Systems #
Generally, file systems cannot be repaired on a running system. If you
encounter serious problems, you may not even be able to mount your root file
system and the system boot may end with a “kernel panic”. In
this case, the only way is to repair the system from the outside. The system
contains the utilities to check and repair the btrfs,
ext2, ext3, ext4,
reiserfs, xfs,
dosfs, and vfat file systems. Look for
the command fsck. FILESYSTEM,
for example, if you need a file system check for btrfs,
use fsck.btrfs.
16.6.2.3 Accessing the Installed System #
If you need to access the installed system from the rescue system, you need to do this in a change root environment. For example, to modify the boot loader configuration, or to execute a hardware configuration utility.
To set up a change root environment based on the installed system, proceed as follows:
Run
lsblkto check which node corresponds to the root partition. It is/dev/sda2in our example:lsblk NAME MAJ:MIN RM SIZE RO TYPE MOUNTPOINT sda 8:0 0 149,1G 0 disk ├─sda1 8:1 0 2G 0 part [SWAP] ├─sda2 8:2 0 20G 0 part / └─sda3 8:3 0 127G 0 part └─cr_home 254:0 0 127G 0 crypt /home
Mount the root partition from the installed system:
mount /dev/sda2 /mnt
Mount
/proc,/dev, and/syspartitions:mount -t proc none /mnt/proc mount --rbind /dev /mnt/dev mount --rbind /sys /mnt/sys
Now you can “change root” into the new environment, keeping the
bashshell:chroot /mnt /bin/bash
Finally, mount the remaining partitions from the installed system:
mount -a
Now you have access to the installed system. Before rebooting the system, unmount the partitions with
umount-aand leave the “change root” environment withexit.
Warning: Limitations
Although you have full access to the files and applications of the
installed system, there are some limitations. The kernel that is running is
the one that was booted with the rescue system, not with the change root
environment. It only supports essential hardware and it is not possible to
add kernel modules from the installed system unless the kernel versions are
identical. Always check the version of the currently running (rescue)
kernel with uname -r and then find out if a matching
subdirectory exists in the /lib/modules directory in
the change root environment. If yes, you can use the installed modules,
otherwise you need to supply their correct versions on other media, such as
a flash disk. Most often the rescue kernel version differs from the
installed one — then you cannot simply access a sound card, for
example. It is also not possible to start a graphical user interface.
Also note that you leave the “change root” environment when you switch the console with Alt–F1 to Alt–F6.
16.6.2.4 Modifying and Re-installing the Boot Loader #
Sometimes a system cannot boot because the boot loader configuration is corrupted. The start-up routines cannot, for example, translate physical drives to the actual locations in the Linux file system without a working boot loader.
To check the boot loader configuration and re-install the boot loader, proceed as follows:
Perform the necessary steps to access the installed system as described in Section 16.6.2.3, “Accessing the Installed System”.
Check that the GRUB 2 boot loader is installed on the system. If not, install the package
grub2and rungrub2-install /dev/sda
Check whether the following files are correctly configured according to the GRUB 2 configuration principles outlined in Book “Reference”, Chapter 12 “The Boot Loader GRUB 2” and apply fixes if necessary.
/etc/default/grub/boot/grub2/device.map(optional file, only present if created manually)/boot/grub2/grub.cfg(this file is generated, do not edit)/etc/sysconfig/bootloader
Re-install the boot loader using the following command sequence:
grub2-mkconfig -o /boot/grub2/grub.cfg
Unmount the partitions, log out from the “change root” environment, and reboot the system:
umount -a
exit
reboot
16.6.2.5 Fixing Kernel Installation #
A kernel update may introduce a new bug which can impact the operation of your system. For example a driver for a piece of hardware in your system may be faulty, which prevents you from accessing and using it. In this case, revert to the last working kernel (if available on the system) or install the original kernel from the installation media.
Tip: How to Keep Last Kernels after Update
To prevent failures to boot after a faulty kernel update, use the kernel
multiversion feature and tell libzypp which
kernels you want to keep after the update.
For example to always keep the last two kernels and the currently running one, add
multiversion.kernels = latest,latest-1,running
to the /etc/zypp/zypp.conf file. See
Book “Reference”, Chapter 6 “Installing Multiple Kernel Versions” for more information.
A similar case is when you need to re-install or update a broken driver for a device not supported by openSUSE Leap. For example when a hardware vendor uses a specific device, such as a hardware RAID controller, which needs a binary driver to be recognized by the operating system. The vendor typically releases a Driver Update Disk (DUD) with the fixed or updated version of the required driver.
In both cases you need to access the installed system in the rescue mode and fix the kernel related problem, otherwise the system may fail to boot correctly:
Boot from the openSUSE Leap installation media.
If you are recovering after a faulty kernel update, skip this step. If you need to use a driver update disk (DUD), press F6 to load the driver update after the boot menu appears, and choose the path or URL to the driver update and confirm with .
Choose from the boot menu and press Enter. If you chose to use DUD, you will be asked to specify where the driver update is stored.
Enter
rootat theRescue:prompt. A password is not required.Manually mount the target system and “change root” into the new environment. For more information, see Section 16.6.2.3, “Accessing the Installed System”.
If using DUD, install/re-install/update the faulty device driver package. Always make sure the installed kernel version exactly matches the version of the driver you are installing.
If fixing faulty kernel update installation, you can install the original kernel from the installation media with the following procedure.
Identify your DVD device with
hwinfo --cdromand mount it withmount /dev/sr0 /mnt.Navigate to the directory where your kernel files are stored on the DVD, for example
cd /mnt/suse/x86_64/.Install required
kernel-*,kernel-*-base, andkernel-*-extrapackages of your flavor with therpm -icommand.
Update configuration files and reinitialize the boot loader if needed. For more information, see Section 16.6.2.4, “Modifying and Re-installing the Boot Loader”.
Remove any bootable media from the system drive and reboot.