Virtualization Guide
- About This Manual
- I Introduction
- II Managing Virtual Machines with
libvirt - III Hypervisor-Independent Features
- IV Managing Virtual Machines with Xen
- 18 Setting Up a Virtual Machine Host
- 19 Virtual Networking
- 20 Managing a Virtualization Environment
- 21 Block Devices in Xen
- 22 Virtualization: Configuration Options and Settings
- 23 Administrative Tasks
- 24 XenStore: Configuration Database Shared between Domains
- 25 Xen as a High-Availability Virtualization Host
- V Managing Virtual Machines with QEMU
- VI Managing Virtual Machines with LXC
- Glossary
- A Virtual Machine Drivers
- B Appendix
- C XM, XL Toolstacks and Libvirt framework
- D GNU Licenses
27 Setting Up a KVM VM Host Server
This section documents how to set up and use openSUSE Leap 42.1 as a QEMU-KVM based virtual machine host.
Tip: Resources
In general, the virtual guest system needs the same hardware resources as SUSE Linux Enterprise Server installed on a physical machine. The more guests you plan to run on the host system, the more hardware resources—CPU, disk, memory, and network—you need to add.
27.1 CPU Support for Virtualization #
In order to run KVM, your CPU must support virtualization, and
virtualization needs to be enabled in BIOS. The file
/proc/cpuinfo includes information about your CPU
features.
To find out whether your system supports virtualization, see Section 7.3, “KVM Hardware Requirements”.
27.2 Required Software #
The KVM host requires several packages to be installed. To install all necessary packages, do the following:
Run › › .

Figure 27.1: Installing the KVM Hypervisor and Tools #
Select and preferably also , and confirm with .
During the installation process, you can optionally let YaST create a for you automatically. If you do not plan to dedicate an additional physical network card to your virtual guests, network bridge is a standard way to connect the guest machines to the network.
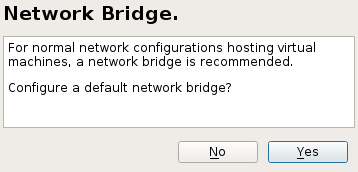
Figure 27.2: Network Bridge #
After all the required packages are installed (and new network setup activated), try to load the KVM kernel module relevant for your CPU type—
kvm-intelorkvm-amd:root #modprobe kvm-intelCheck if the module is loaded into memory:
tux >lsmod | grep kvm kvm_intel 64835 6 kvm 411041 1 kvm_intelNow the KVM host is ready for serving KVM VM Guests. For more information, see Chapter 29, Running Virtual Machines with qemu-system-ARCH.
27.3 KVM Host-Specific Features #
You can improve the performance of KVM-based VM Guests by letting them fully utilize specific features of the VM Host Server's hardware (paravirtualization). This section introduces techniques to make the guests access the physical host's hardware directly—without the emulation layer—to make the most use of it.
Tip
Examples included in this section assume basic knowledge of the
qemu-system-ARCH command
line options. For more information, see
Chapter 29, Running Virtual Machines with qemu-system-ARCH.
27.3.1 Using the Host Storage with virtio-scsi #
virtio-scsi is an advanced storage stack for
KVM. It replaces the former virtio-blk stack
for SCSI devices pass-through. It has several advantages over
virtio-blk:
- Improved scalability
KVM guests have a limited number of PCI controllers which results in a limited number of possibly attached devices.
virtio-scsisolves this limitation by grouping multiple storage devices on a single controller. Each device on avirtio-scsicontroller is represented as a logical unit, or LUN.- Standard command set
While
virtio-blkuses a small set of commands which has to be known to both thevirtio-blkdriver and the virtual machine monitor. To introduce a new command means to update both the driver and the monitor.However,
virtio-scsidoes not define commands, but a transport protocol for these commands following the industry-standard SCSI specification. This approach is shared with a number of other technologies, such as Fibre Channel, ATAPI, or USB devices.- Device naming
virtio-blkdevices are presented inside the guest as/dev/vdXwhich is different from device names in physical systems and may cause migration problems.virtio-scsikeeps the device names identical to those on physical systems, making the virtual machines easily relocatable.- SCSI device pass-through
For virtual disks backed by a whole LUN on the host, it is preferable for the guest to send SCSI commands directly to the LUN (pass-through). This is limited in
virtio-blk, as guests need to use the virtio-blk protocol instead of SCSI command pass-through, and, moreover, it is not available for Windows guests.virtio-scsinatively removes these limitations.
27.3.1.1 virtio-scsi Usage #
KVM supports SCSI pass-through feature with the
virtio-scsi-pci device:
qemu-system-x86_64 [...] \
-device virtio-scsi-pci,id=scsi
27.3.2 Accelerated Networking with vhost-net #
The vhost-net module is used to accelerate
KVM's paravirtualized network drivers. It provides better latency and
greater throughput for network. Use the vhost-net
driver by starting the guest with the following example command line:
qemu-system-x86_64 [...] \
-netdev tap,id=guest0,vhost=on,script=no \
-net nic,model=virtio,netdev=guest0,macaddr=00:16:35:AF:94:4B
Note that guest0 is an identification string of the
vhost-driven device.
27.3.3 Scaling Network Performance with Multiqueue virtio-net #
As the number of virtual CPUs increases in VM Guests, QEMU offers a way of improving the network performance using multiqueue. Multiqueue virtio-net scales the network performance by allowing VM Guest virtual CPUs to transfer packets in parallel. Multiqueue support is required on both VM Host Server and VM Guest side.
Tip: Performance Benefit
The Multiqueue virtio-net solution is most beneficial in the following cases:
Network traffic packets are large.
VM Guest has more connections active at the same time, mainly between the guest systems, or between the guest and the host, or between the guest and an external system.
The number of active queues is equal to the number of virtual CPUs in the VM Guest.
Note
While multiqueue virtio-net increases the total network throughput, it increases CPU consumption as it uses of the virtual CPU's power.
Procedure 27.1: How to Enable Multiqueue virtio-net #
The following procedure lists important steps to enable the multiqueue
feature with qemu-system-ARCH. It assumes that a tap
network device with multiqueue capability (supported since kernel
version 3.8) is set up on the VM Host Server.
In
qemu-system-ARCH, enable multiqueue for the tap device:-netdev tap,vhost=on,queues=N
where
Nstands for the number of queue pairs.In
qemu-system-ARCH, enable multiqueue and specify MSI-X (Message Signaled Interrupt) vectors for the virtio-net-pci device:-device virtio-net-pci,mq=on,vectors=2*N+2
where the formula for the number of MSI-X vectors results from: N vectors for TX (transmit) queues, N for RX (receive) queues, one for configuration purposes, and one for possible VQ (vector quantization) control.
In VM Guest, enable multiqueue on the relevant network interface (
eth0in this example):ethtool -L eth0 combined 2*N
The resulting qemu-system-ARCH command line will look
similar to the following example:
qemu-system-x86_64 [...] -netdev tap,id=guest0,queues=4,vhost=on \
-device virtio-net-pci,netdev=guest0,mq=on,vectors=10
Note that the id of the network device
(guest0 ) needs to be identical for both options.
Inside the running VM Guest, specify the following command as
root:
ethtool -L eth0 combined 8
Now the guest system networking uses the multiqueue support from the
qemu-system-ARCH hypervisor.
27.3.4 VFIO: Secure Direct Access to Devices #
Directly assigning a PCI device to a VM Guest (PCI pass-through) avoids performance issues caused by avoiding any emulation in performance critical paths. VFIO replaces the traditional KVM PCI Pass-Through device assignment. Prerequisite for this feature is a VM Host Server configuration described in Important: Requirements for VFIO and SR-IOV.
To be able to assign a PCI device via VFIO to a VM Guest, you need to find out which IOMMU Group it belongs to. The IOMMU (input/output memory management unit that connects a direct memory access-capable I/O bus to the main memory) API supports the notion of groups. A group is a set of devices that can be isolated from all other devices in the system. Groups are therefore the unit of ownership used by VFIO.
Procedure 27.2: Assigning a PCI Device to a VM Guest via VFIO #
Identify the host PCI device to assign to the guest.
tux >sudo lspci -nn [...] 00:10.0 Ethernet controller [0200]: Intel Corporation 82576 \ Virtual Function [8086:10ca] (rev 01) [...]Note down the device ID (
00:10.0in this case) and the vendor ID (8086:10ca).Find the IOMMU group of this device:
tux >sudo readlink /sys/bus/pci/devices/0000\:00\:10.0/iommu_group ../../../kernel/iommu_groups/20The IOMMU group for this device is
20.Now you can check the devices belonging to the same IOMMU group:ls -l /sys/bus/pci/devices/0000:01:10.0/iommu_group/devices/0000:01:10.0 [...] 0000:00:1e.0 -> ../../../../devices/pci0000:00/0000:00:1e.0 [...] 0000:01:10.0 -> ../../../../devices/pci0000:00/0000:00:1e.0/0000:01:10.0 [...] 0000:01:10.1 -> ../../../../devices/pci0000:00/0000:00:1e.0/0000:01:10.1
Unbind the device from the device driver:
sudo echo "0000:01:10.0" > /sys/bus/pci/devices/0000\:01\:10.0/driver/unbind
Bind the device to the vfio-pci driver using the vendor ID from step 1:
sudo echo "8086 153a" > /sys/bus/pci/drivers/vfio-pci/new_id
A new device
/dev/vfio/IOMMU_GROUPwill be created as a result,/dev/vfio/20in this case.Change the ownership of the newly created device:
chown qemu.qemu /dev/vfio/DEVICE
Now run the VM Guest with the PCI device assigned.
qemu-system-ARCH [...] -device
     vfio-pci,host=00:10.0,id=ID
Important: No Hot-plugging
As of openSUSE Leap 42.1 hot-plugging of PCI devices passed to a VM Guest via VFIO is not supported.
You can find more detailed information on the
VFIO driver in the
/usr/src/linux/Documentation/vfio.txt file (package
kernel-source has to be installed).
27.3.5 USB Pass-Through #
To assign an existing host USB device to a VM Guest, you need to find out its host bus and device ID.
tux@vmhost:~> lsusb
[...]
Bus 002 Device 005: ID 12d1:1406 Huawei Technologies Co., Ltd. E1750
[...]
In the above example, we want to assign a USB stick connected to the host's USB bus number 2 with device number 5. Now run the VM Guest with the following additional options:
qemu-system-x86_64 [...] -usb -device usb-host,hostbus=2,hostaddr=5
After the guest is booted, check that the assigned USB device is present on it.
tux@vmguest:~> lsusb
[...]
Bus 001 Device 002: ID 12d1:1406 Huawei Technologies Co., Ltd. E1750
[...]
Note
The guest operating system must take care of mounting the assigned USB device so that it is accessible for the user.
27.3.6 PCI Pass-Through (Deprecated) #
PCI Pass-Through is a technique to give your VM Guest exclusive access to a VM Host Server PCI device. Prerequisite for this feature is a VM Host Server configuration described in Important: Requirements for VFIO and SR-IOV. Assigning graphics cards is not supported by SUSE.
Important: PCI Pass-Through is deprecated
KVM PCI Pass-Through has been replaced by VFIO (see VFIO for more information). Although it is still supported by SUSE, it is recommended to use VFIO for assigning PCI devices as described in Section 27.3.4, “VFIO: Secure Direct Access to Devices”. vt.io.vfio
Procedure 27.3: Configuring PCI Pass-Through (Deprecated) #
Identify the host PCI device to assign to the guest.
tux >sudo lspci -nn [...] 00:1b.0 Audio device [0403]: Intel Corporation 82801H (ICH8 Family) \ HD Audio Controller [8086:284b] (rev 02) [...]Note down the device (
00:1b.0) and vendor (8086:284b) ID.Unbind the device from host Kernel driver and bind it to the PCI stub driver.
sudo modprobe pci_stub
sudo echo "8086 284b" > /sys/bus/pci/drivers/pci-stub/new_id
sudo echo "0000:00:1b.0" > /sys/bus/pci/devices/0000:00:1b.0/driver/unbind
sudo echo "0000:00:1b.0" > /sys/bus/pci/drivers/pci-stub/bind
Now run the VM Guest with the PCI device assigned.
qemu-system-x86_64 [...] -device pci-assign,host=00:1b.0
Note: IRQ Sharing
If the PCI device shares IRQ with other devices, it cannot be assigned to a VM Guest.
KVM also supports PCI device hot-plugging to a VM Guest. To achieve this, you need to switch to a QEMU monitor (see Chapter 30, Virtual Machine Administration Using QEMU Monitor for more information) and issue the following commands:
hot-add:
device_add pci-assign,host=00:1b.0,id=new_pci_device
hot-remove:
device_del new_pci_device
27.3.7 VirtFS: Sharing Directories between Host and Guests #
VM Guests usually run in a separate computing space—they are provided their own memory range, dedicated CPUs, and file system space. The ability to share parts of the VM Host Server's file system makes the virtualization environment more flexible by simplifying mutual data exchange. Network file systems, such as CIFS and NFS, have been the traditional way of sharing directories. But as they are not specifically designed for virtualization purposes, they suffer from major performance and feature issues.
KVM introduces a new optimized method called VirtFS (sometimes called “file system pass-through”). VirtFS uses a paravirtual file system driver, which avoids converting the guest application file system operations into block device operations, and then again into host file system operations.
You typically use VirtFS for the following situations:
To access a shared directory from several guests, or to provide guest-to-guest file system access.
To replace the virtual disk as the root file system to which the guest's RAM disk connects during the guest boot process.
To provide storage services to different customers from a single host file system in a cloud environment.
27.3.7.1 Implementation #
In QEMU, the implementation of VirtFS is facilitated by defining two types of devices:
virtio-9p-pcidevice which transports protocol messages and data between the host and the guest.fsdevdevice which defines the export file system properties, such as file system type and security model.
Example 27.1: Exporting Host's File System with VirtFS #
qemu-system-x86_64 [...] \
-fsdev local,id=exp11,path=/tmp/2,security_model=mapped3 \
-device virtio-9p-pci,fsdev=exp14,mount_tag=v_tmp5
Identification of the file system to be exported. | |
File system path on the host to be exported. | |
Security model to be used— | |
The exported file system ID defined before with | |
Mount tag used later on the guest to mount the exported file system. |
Such an exported file system can be mounted on the guest like this
sudo mount -t 9p -o trans=virtio v_tmp /mnt
where v_tmp is the mount tag defined earlier with
-device mount_tag= and /mnt is
the mount point where you want to mount the exported file system.
27.3.8 KSM: Sharing Memory Pages between Guests #
Kernel SamePage Merging (KSM) is a Linux Kernel feature that merges identical memory pages from multiple running processes into one memory region. Because KVM guests run as processes under Linux, KSM provides the memory overcommit feature to hypervisors for more efficient use of memory. Therefore, if you need to run multiple virtual machines on a host with limited memory, KSM may be helpful to you.
KSM stores its status information in
the files under the /sys/kernel/mm/ksm directory:
tux > ls -1 /sys/kernel/mm/ksm
full_scans
merge_across_nodes
pages_shared
pages_sharing
pages_to_scan
pages_unshared
pages_volatile
run
sleep_millisecs
For more information on the meaning of the
/sys/kernel/mm/ksm/* files, see
/usr/src/linux/Documentation/vm/ksm.txt (package
kernel-source).
To use KSM, do the following.
Although openSUSE Leap 12 SP1 includes KSM support in the kernel, it is disabled by default. To enable it, run the following command: openSUSE Leap.
root #echo 1 > /sys/kernel/mm/ksm/runNow run several VM Guests under KVM and inspect the content of files
pages_sharingandpages_shared, for example:while [ 1 ]; do cat /sys/kernel/mm/ksm/pages_shared; sleep 1; done 13522 13523 13519 13518 13520 13520 13528