20 Brasero: Burning CDs and DVDs
Abstract#
Brasero is a GNOME program for writing data and audio CDs and DVDs. Start the program from the main menu by clicking › › .
The following sections are a quick introduction on how to create an own CD or DVD.
20.1 Creating a Data CD or DVD #
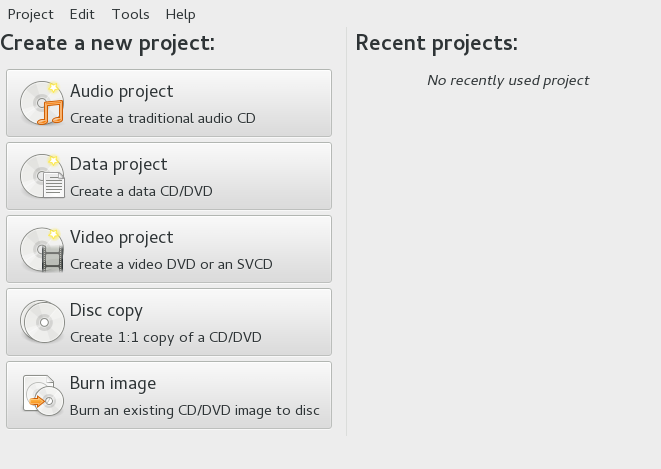
After starting Brasero for the first time, the main window appears as shown in Figure 20.1.
Figure 20.1: Main View of Brasero #
To create a data CD or DVD, proceed as follows:
Click or select › › . The project view appears.
Drag and drop the desired directories or individual files either from your file manager or by clicking the plus icon. To show your directory structure directly in Brasero, select › or press F7.
Optionally, save the project under a name of your choice with › .
Name your medium. The original label is .
Choose the output medium from the pull down menu next to the button (CD/DVD or in an ISO image file).
Click . A new dialog appears, depending on what medium you have selected in the previous step:
CD/DVD. You can define some parameters, like the burning speed or where to store temporary files. Under you can also choose whether to burn the image directly, close the session, verify the written data, and others.
ISO Image. Specify a file name for your ISO image file.
Start the process with .
20.2 Creating an Audio CD #
There are no significant differences between creating an audio CD and creating a data CD. Proceed as follows:
Select › › .
Drag and drop the individual audio tracks to the project directory. The audio data must be in WAV or Ogg Vorbis format. Determine the sequence of the tracks by moving them up or down in the project directory.
Click . A dialog opens.
Specify a drive to write to.
Click to adjust burning speed and other preferences. When burning audio CDs, choose a lower burning speed to reduce the risk of burn errors.
Click .
20.3 Copying a CD or DVD #
To copy a CD or DVD, proceed as follows:
Click or go to › › . The dialog opens.
Specify the source drive you want to copy.
Specify a drive or image file to write to.
If necessary, change the burning speed, the temporary directory and other options in .
Click .
20.4 Writing ISO Images #
If you already have an ISO image, click or go to › › . Choose the medium and writer and, if necessary, change parameters by clicking . Choose the location of the image file with the pop-up menu labeled . Start the burning process and click .
20.5 Creating a Multisession CD or DVD #
Multisession discs can be used to write data in more than one burning session. This is useful, for example, for writing backups that are smaller than the media. In each session, you can add another backup file. One note of interest is that you are not only limited to data CDs or DVDs. You can also add audio sessions in a multisession disc.
To start a new multisession disc, do the following:
Start with a data disc first as described in Section 20.1, “Creating a Data CD or DVD”. You cannot start with an audio CD session. Make sure that you do not fill up the entire disc, because otherwise you cannot append a new session.
Click . The window opens.
Select to make the disc multisession capable. Configure other options if needed.
Start the burning session with .
20.6 For More Information #
You can find more information about Brasero at http://www.gnome.org/projects/brasero/.

