2 Working with Your Desktop
- 2.1 Managing Files and Directories
- 2.2 Accessing Removable Media
- 2.3 Searching for Files
- 2.4 Copying Text Between Applications
- 2.5 Managing Internet Connections
- 2.6 Exploring the Internet
- 2.7 E-mail and Scheduling
- 2.8 Opening or Creating Documents with LibreOffice
- 2.9 Controlling Your Desktop’s Power Management
- 2.10 Creating, Displaying, and Decompressing Archives
- 2.11 Taking Screenshots
- 2.12 Viewing PDF Files
- 2.13 Obtaining Software Updates
- 2.14 For More Information
In this chapter you will learn how to work with files and burn CDs. You will also find out how to perform regular tasks with your desktop.
2.1 Managing Files and Directories #
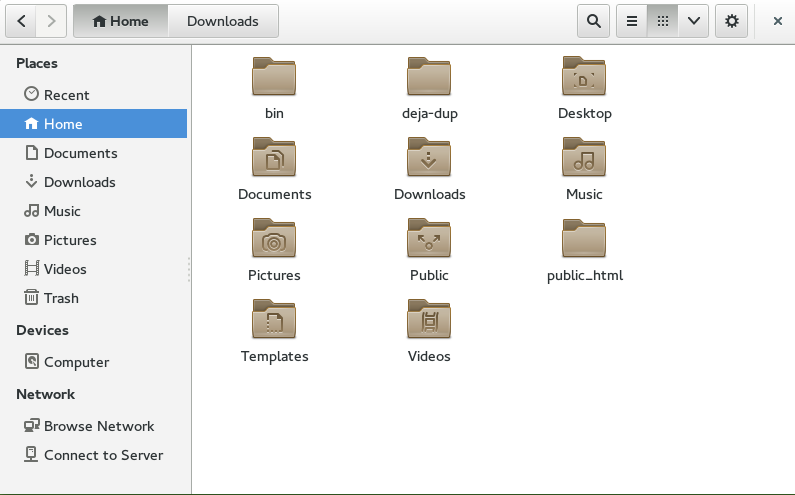
Use GNOME Files (formerly known as Nautilus) to view and create directories and documents on your computer and in the network. You can also use GNOME Files to create CDs of your data.
You can open GNOME Files in multiple ways:
Click › › .
Open the Activities Overview and search for
files.On the desktop, double-click .
Open the menu and select any entry, such as .
Figure 2.1: File Manager #
The elements of the GNOME Files window include the following:
- Toolbar
The toolbar contains back and forward buttons, the path bar, a search function, elements to let you change the layout of the content area, and the application menu.
- Menu
The menu is the last icon on the toolbar, labeled with a cog wheel icon. It lets you perform many tasks, such as opening the preferences dialog, creating a new directory or opening a new window or tab.
- Sidebar
The sidebar lets you navigate between often-used directories and external or network storage devices. To display or hide the sidebar, press F9.
- Content Area
Displays files and directories.
Use the icons in the top right part of the window to switch between list and grid icon view. The menu to the right of these icons can be used to further customize the view.
- Context Menus
Open a context menu by right-clicking inside the content area. The items in this menu depend on where you right-click.
For example, if you right-click a file or directory, you can select items related to the file or directory. If you right-click the background of a content area, you can select items related to the display of items in the content area.
- Floating Statusbar
The floating statusbar appears when a file is selected. It displays the file name and size.
2.1.1 Key Combinations #
The following table lists a selection of key combinations of GNOME Files.
Table 2.1: GNOME Files Key Combinations #
|
Key Combination |
Description |
|---|---|
|
Alt–←/ Alt–→ |
Go backward/go forward. |
|
Alt–↑ |
Open the parent directory. |
|
←, →, ↑, ↓ |
Select an item. |
|
Alt–↓ or Enter |
Open an item. |
|
Alt–Enter |
Open an item's dialog. |
|
Shift–Alt–↓ |
Open an item and close the current directory. |
|
Ctrl–L |
Transform the path bar from a button view to a text box. Exit this mode by pressing Enter (go to the location) or Esc (to remain in the current directory). |
|
/ |
Transform the path bar from a button view to a text box and replace
the current path with |
|
Alt–Home |
Open your home directory. |
|
Any number or letter key |
Start a search within the current directories and their subdirectories. The character you pressed is used as the first character of the search term. Search happens as you type, you do not need to press Enter. |
|
Ctrl–T |
Start a search within the current directories and their subdirectories. The character you pressed is used as the first character of the search term. Search happens as you type, you do not need to press Enter. |
2.1.2 Compressing Files or Directories #
Sometimes, it is useful to archive or compress files, for example:
You want to attach an entire directory, including its subdirectories, to an e-mail.
You want to attach a large file to an e-mail.
You want to save space on your hard disk and have files you rarely use.
In all these cases, you can create a compressed file, such as a ZIP file, which can contain multiple original files. How much smaller the compressed version is than the original depends on the file type. Many video, image and office document formats are already compressed and will only become marginally smaller.
In the GNOME Files content area, right-click the directory you want to archive, then click .
Accept the default archive file name or provide a new one.
Select a file extension from the drop-down box.
.zipfiles are supported on most operating systems, including Windows*..tar.gzfiles are compatible with most Linux* and Unix* systems..7zfiles usually offer better compression ratios than other formats, but are not as widely supported.
Specify a location for the archive file, then click .
To extract an archived file, right-click the file, then select . You can also double-click the compressed file to open it and see which files are included.
For more information on compressed files, see Section 2.10, “Creating, Displaying, and Decompressing Archives”.
2.1.3 Burning a CD/DVD #
If your system has a CD or DVD writer, you can use GNOME Files to burn CDs and DVDs. If you want to burn an audio CD or need more control over the result, see Chapter 20, Brasero: Burning CDs and DVDs.
Open GNOME Files.
Insert a blank medium.
Find the files you want to add to the medium and drag them to the sidebar item called . (The label may read slightly differently, depending on the type of medium you inserted.) When your mouse pointer is over the sidebar item, a small
+should appear next to the pointer.When you have dragged all files onto the sidebar item , click it.
Provide a name next to or keep the proposal.
Click .
In the appearing dialog , make sure the right medium is selected. Then click .
The files are burned to the disc. This can take a few minutes, depending on the amount of data being burned and the speed of your burner.
After the medium has been burned, it will be ejected from the drive. In the window , you can click .
To burn an ISO disc image, first insert a medium, then double-click the ISO file in GNOME Files. In the dialog , click .
2.1.4 Creating a Bookmark #
Use the bookmarks feature in GNOME Files to quickly jump to your favorite directories from the sidebar.
Switch to the directory for which you want to create a bookmark in the content area.
Click the cog wheel icon, then select from the menu.
The bookmark now appears in the sidebar, with the directory name as the bookmark name.
(Optional) If you want, you can change the name of the bookmark. This does not affect the name of the bookmarked directory itself. To change the name, right-click the new sidebar item and select .
(Optional) If you want, you can change the order in which the bookmarks are displayed. To reorder, click a bookmark and drag it to the desired location.
To switch to a bookmarked directory, click the appropriate sidebar item.
2.1.5 File Manager Preferences #
Open the file manager preferences by clicking the cog wheel icon and selecting .
2.1.6 Accessing Remote Files #
You can use GNOME Files to access files on remote servers. For more information, see Chapter 5, Accessing Network Resources.
2.2 Accessing Removable Media #
To access CDs/DVDs or flash disks, insert or attach the medium. An icon for the medium is automatically created on the desktop. For many types of removable media, a GNOME Files window pops up automatically. If GNOME Files does not open, double-click the icon for that drive on the desktop to view the contents. In GNOME Files, you will see an item for the medium in the sidebar.
Warning: Unmount to Prevent Data Loss
Do not physically remove flash disks immediately after using them. Even when the system does not indicate that data is being written, the drive may not be finished with a previous operation.
On the desktop or in the sidebar of GNOME Files, right-click the icon for the medium and select or .
2.3 Searching for Files #
There are multiple ways to search for files or directories. In all cases, the search will be performed on file and directory names. Searching by file size, modification date and other properties is not possible in the preinstalled graphical tools. Such searches are easier to do on the command line.
- Using GNOME Files
In GNOME Files, navigate to the directory from which you want to start the search. Then start typing the search term.
- Using the Activities Overview
Open the Activities Overview by pressing Meta. Then start typing the search term. The search will be performed within your home directory.
- Using the Desktop Search application
Click › › . Enter the search term in the text box . The search will be performed within your home directory.
2.4 Copying Text Between Applications #
Copy and paste works the same as in other operating systems. First select the text, so that it appears highlighted, usually in blue. Then press Ctrl–C. Now move the keyboard focus to the right position. Finally, to insert the text, press Ctrl–V.
To copy or paste in the terminal, additionally press Shift together with the above key combinations.
An alternative way of using copy and paste is described in the following. First select the text. To paste the text, middle-click over the position where you want the text to be pasted. As soon as you make another selection, the text from the original selection will be replaced in the clipboard.
When copying information between programs, you must keep the source program open and paste the text before closing it. When a program closes, any content from that application that is on the clipboard is lost.
2.5 Managing Internet Connections #
To surf the Internet or send and receive e-mail messages, you must have configured an Internet connection with YaST. Depending on your environment, in YaST select whether to use NetworkManager. In GNOME, you can then establish Internet connections with NetworkManager as described in Book “Reference”, Chapter 28 “Using NetworkManager”, Section 28.3 “Configuring Network Connections”.
For a list of criteria to help you decide whether to use NetworkManager, refer to Book “Reference”, Chapter 28 “Using NetworkManager”, Section 28.1 “Use Cases for NetworkManager”.
2.6 Exploring the Internet #
The GNOME desktop includes Firefox, a Mozilla*-based Web browser. You can start it by clicking › › .
You can type an address into the location bar at the top or click links in a page to move to different pages, like in any other Web browser.
For more information, see Chapter 16, Firefox: Browsing the Web.
2.7 E-mail and Scheduling #
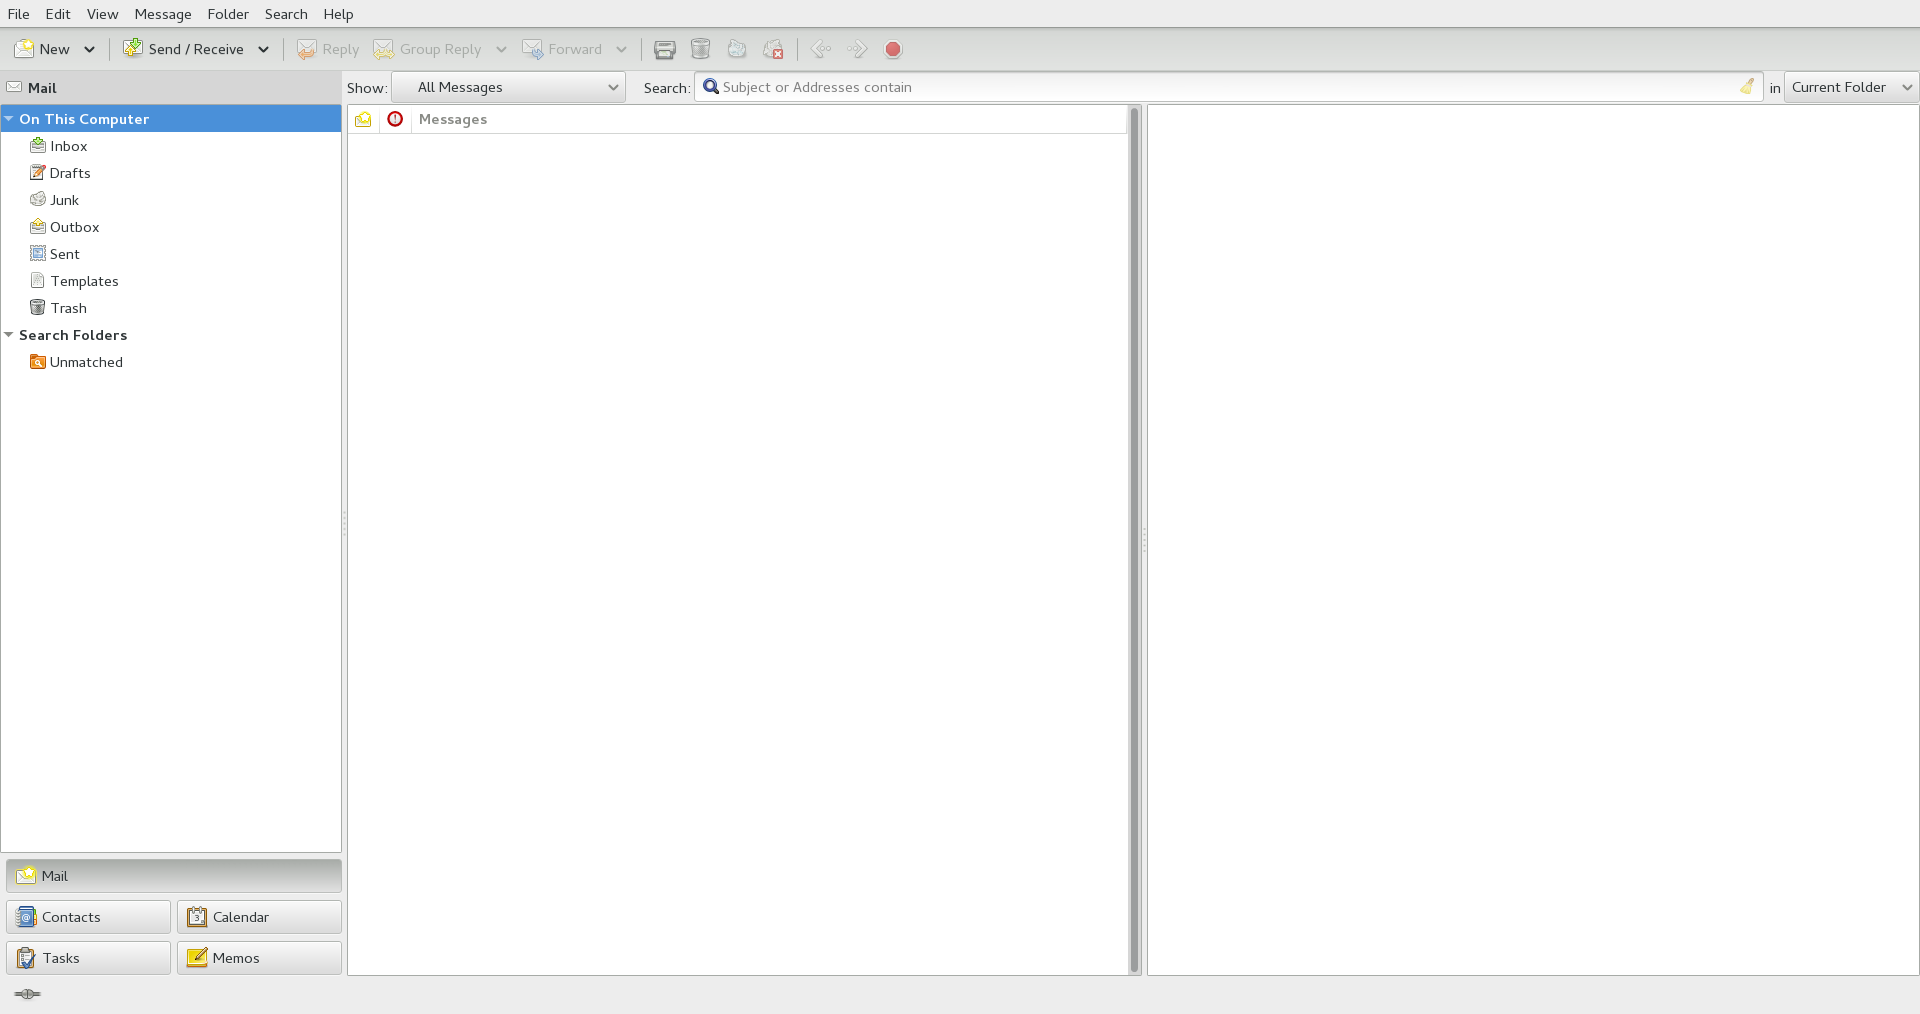
For reading and managing your mail and events, use Evolution. Evolution is a groupware program that makes it easy to store, organize and retrieve your personal information.
Evolution seamlessly combines e-mail, a calendar, an address book, and a memo and task list in one easy-to-use application. With its extensive support for communications and data interchange standards, Evolution can work with existing corporate networks and applications, including Microsoft* Exchange.
To start Evolution, click › › .
The first time you start Evolution, it prompts you with a few questions to set up a mail account and import mail from an old mail client. Then it shows you how many new messages you have and lists upcoming appointments and tasks. The calendar, address book and mail tools are available in the shortcut bar on the left.
For more information, see Chapter 12, Evolution: E-Mailing and Calendaring.
2.8 Opening or Creating Documents with LibreOffice #
For creating and editing documents, LibreOffice is installed with the GNOME desktop. LibreOffice is a complete set of office tools that can both read and save Microsoft Office file formats. LibreOffice has a word processor, a spreadsheet, a database, a drawing tool and a presentation program.
To start LibreOffice, click › › .
For more information, see Chapter 8, LibreOffice: The Office Suite.
2.9 Controlling Your Desktop’s Power Management #
To see the state of the computer battery, check the battery icon in the right part of the panel. On certain events, such as a critically low battery state, GNOME will display notifications informing you about the event.
You can open the power settings via › › › .
For more information, see Section 3.3.2, “Configuring Power Settings”.
2.10 Creating, Displaying, and Decompressing Archives #
You can use the Archive Manager application (also known as File Roller)
to create, view, modify or unpack an archive. An archive is a file that
acts as a container for other files. An archive can contain many files,
directories and subdirectories, usually in compressed form. Archive
Manager supports common formats such as zip,
tar.gz, tar.bz2,
lzh, and rar. You can use
Archive Manager to create, open and extract a compressed non-archive
file.
To start Archive Manager, click › › .
If you already have a compressed file, double-click the file name in GNOME Files to view the contents of the archive in Archive Manager.
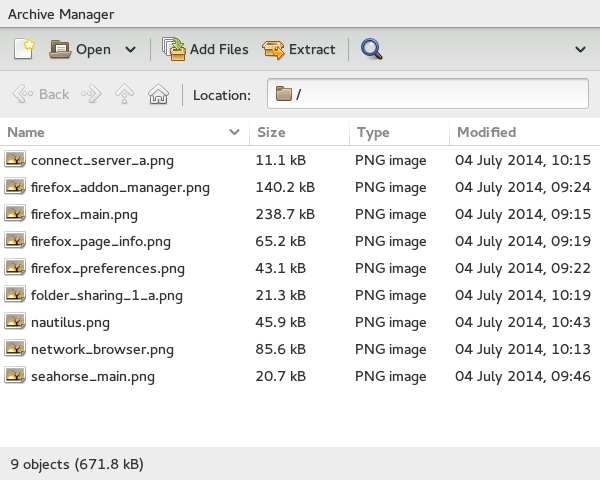
Figure 2.2: Archive Manager #
2.10.1 Opening an Archive #
In Archive Manager, click .
Select the archive you want to open.
Click .
Archive Manager displays the following:
The archive name in the titlebar.
The archive contents in the content area.
The total number of files in the archive and the size of the archive when uncompressed, in the statusbar.
To open another archive, click again. Archive Manager opens each archive in a new window. To open another archive in the same window, you must first select from the menu in the right part of the window to close the current archive, then click .
If you try to open an archive that was created in a format that Archive Manager does not recognize, the application displays an error message.
2.10.2 Extracting Files from an Archive #
In Archive Manager, select the files that you want to extract.
Click .
Specify the directory where Archive Manager will extracts the files.
Choose from the following extraction options:
Option
Description
All files
Extracts all files from the archive.
Selected files
Extracts the selected files from the archive.
Files
Extracts from the archive all files that match the specified pattern.
Keep directory structure
Reconstructs the directory structure when extracting the specified files.
For example, you specify
/tmpin the text box and extract all files. The archive contains a subdirectory calleddoc. If you select the option, Archive Manager extracts the contents of the subdirectory to/tmp/doc.If you do not select the option, Archive Manager does not create any subdirectories. Instead, it extracts all files from the archive, including files from subdirectories, to
/tmp.Do not overwrite newer files
If not active, the Archive Manager overwrites any files in the destination directory that have the same name as the specified files.
If you select this option, Archive Manager does not extract the specified file if an existing file with the same name already exists in the destination directory.
Click .
To extract an archived file in a file manager window without opening Archive Manager, right-click the file and select .
The Extract operation extracts a copy of the specified files from the archive. The extracted files have the same permissions and modification date as the original files that were added to the archive.
The Extract operation does not change the contents of the archive.
2.10.3 Creating Archives #
In Archive Manager, click the white icon in the top left part of the window.
Specify the name and location of the new archive.
Select an archive type from the drop-down box.
Click .
Archive Manager creates an empty archive, but does not yet write the archive to disk. Archive Manager writes a new archive to disk only when the archive contains at least one file. If you create a new archive and quit Archive Manager before you add any files to the archive, the archive will be deleted.
Add files and directories to the new archive:
Click and select the files or directories you want to add.
Click .
Archive Manager adds the files to the current directory in the archive.
You can also add files to an archive in a file manager window without opening Archive Manager. See Section 2.1.2, “Compressing Files or Directories” for more information.
2.11 Taking Screenshots #
You can take a snapshot of your screen or of an individual application window by using the Take Screenshots utility. Start it by pressing Print to take a screenshot of the entire desktop or by pressing Alt–Print to take a screenshot of the currently active window or dialog.
The screenshots are automatically saved to your
~/Pictures directory.
You can also use GIMP to take screenshots. In GIMP, click › › , select an area, choose a delay and then click .
2.12 Viewing PDF Files #
Documents that need to be shared or printed across platforms can be saved as PDF (Portable Document Format) files. Document Viewer (also known as Evince) can open PDF files and many similar file types, such as XPS, DjVu, or TIFF.
Note: Rare Display Issues
In rare cases, documents will not be displayed correctly in Document Viewer. This can happen, for example, with certain forms, animations or 3D images. In such cases, ask the authors of the file what viewer they recommend. However, in at least some cases the recommended viewer will not work on Linux.
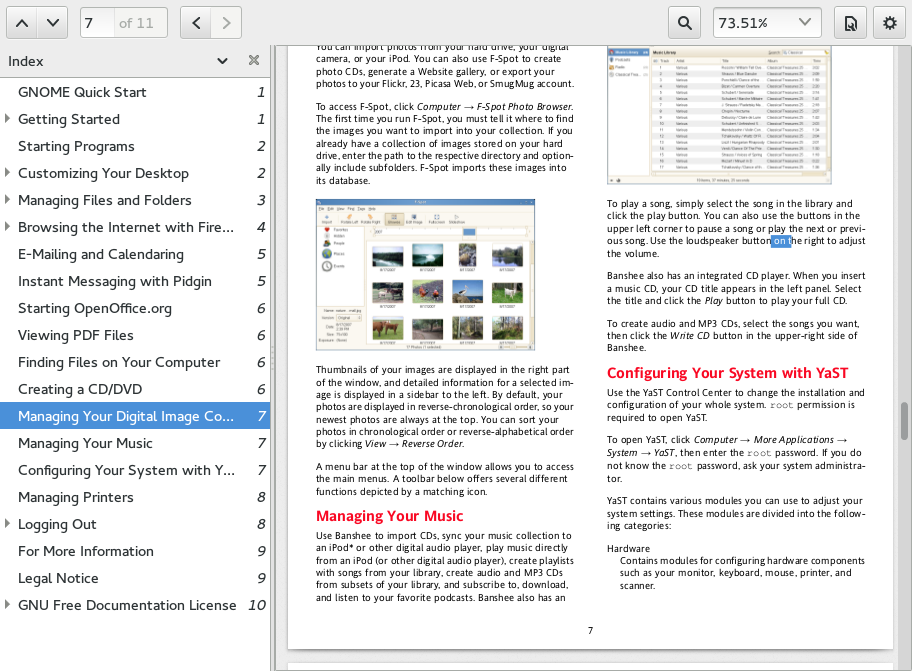
Figure 2.3: Document Viewer #
To open Document Viewer, double-click a PDF file in a file manager window. Document Viewer will also open when you download a PDF file from a Web site. To open Document Viewer without a file, select › › .
To view a PDF file in Document Viewer, click the cog wheel icon to open the menu and select . Now locate the desired PDF file and click .
Use the navigation icons at the top of the window or the thumbnails in the left panel to navigate through the document. If your PDF document provides bookmarks, you can access them in the left panel of the viewer.
2.13 Obtaining Software Updates #
When you connect to the Internet, the updater applet automatically checks whether software updates for your system are available. When important updates are available, you will receive a notification on your desktop.
For detailed information on how to install software updates with the updater applet and how to configure it, refer to the chapter about installing and removing software in Book “Start-Up”, Chapter 9 “Installing or Removing Software”, Section 9.4 “Keeping the System Up-to-date”.
2.14 For More Information #
Along with the applications described in this chapter for getting started, you can use many other applications on GNOME. Find detailed information about these applications in the other parts of this manual.
To learn more about GNOME and GNOME applications, see http://www.gnome.org.
To report bugs or add feature requests, go to http://bugzilla.gnome.org.


