Virtualization Guide
- Preface
- I Introduction
- II Managing virtual machines with
libvirt - III Hypervisor-independent features
- IV Managing virtual machines with Xen
- 22 Setting up a virtual machine host
- 23 Virtual networking
- 24 Managing a virtualization environment
- 25 Block devices in Xen
- 26 Virtualization: configuration options and settings
- 27 Administrative tasks
- 28 XenStore: configuration database shared between domains
- 29 Xen as a high-availability virtualization host
- 30 Xen: converting a paravirtual (PV) guest into a fully virtual (FV/HVM) guest
- V Managing virtual machines with QEMU
- VI Troubleshooting
- Glossary
- A Configuring GPU Pass-Through for NVIDIA cards
- B GNU licenses
6 Installation of virtualization components #Edit source
6.1 Introduction #Edit source
To run a virtualization server (VM Host Server) that can host one or more guest systems (VM Guests), you need to install required virtualization components on the server. These components vary depending on which virtualization technology you want to use.
6.2 Installing virtualization components #Edit source
You can install the virtualization tools required to run a VM Host Server in one of the following ways:
By selecting a specific system role during openSUSE Leap installation on the VM Host Server
By running the YaST Virtualization module on an already installed and running openSUSE Leap.
By installing specific installation patterns on an already installed and running openSUSE Leap.
6.2.1 Specifying a system role #Edit source
You can install all the tools required for virtualization during the installation of openSUSE Leap on the VM Host Server. During the installation, you are presented with the screen.
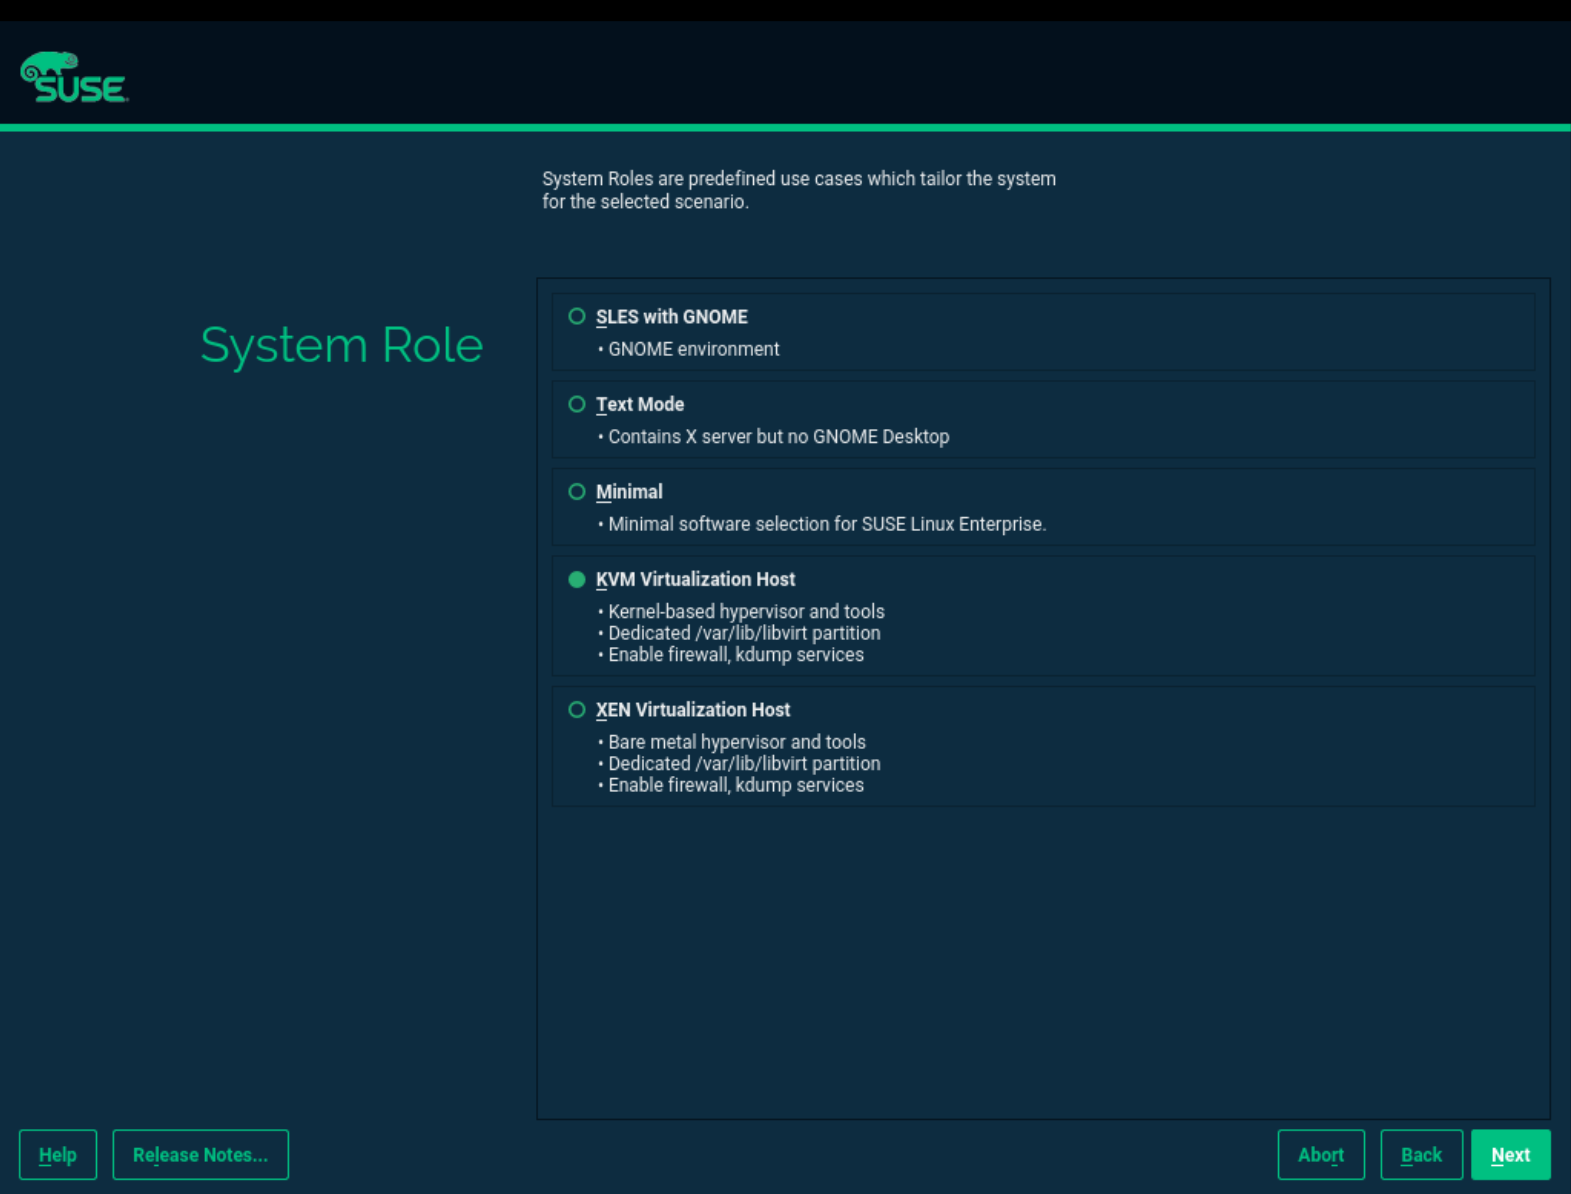
Figure 6.1: System Role screen #
Here you can select either the or the roles. The appropriate software selection and setup is automatically performed during openSUSE Leap installation.
Tip
Both virtualization system roles create a dedicated
/var/lib/libvirt partition, and enable the
firewalld and Kdump services.
6.2.2 Running the YaST Virtualization module #Edit source
Depending on the scope of openSUSE Leap installation on the VM Host Server, none of the virtualization tools may be installed on your system. They are automatically installed when configuring the hypervisor with the YaST Virtualization module.
Tip
The YaST Virtualization module is included in the yast2-vm package. Verify it is installed on the VM Host Server before installing virtualization components.
Procedure 6.1: Installing the KVM environment #
To install the KVM virtualization environment and related tools, proceed as follows:
Start YaST and select › .
Select for a minimal installation of QEMU and KVM environment. Select if you want to use the
libvirt-based management stack as well. Confirm with .YaST offers to automatically configure a network bridge on the VM Host Server. It ensures proper networking capabilities of the VM Guest. Agree to do so by selecting , otherwise choose .
After the setup has been finished, you can start creating and configuring VM Guests. Rebooting the VM Host Server is not required.
Procedure 6.2: Installing the Xen environment #
To install the Xen virtualization environment, proceed as follows:
Start YaST and select › .
Select for a minimal installation of Xen environment. Select to use the
libvirt-based management stack as well. Confirm with .YaST offers to automatically configure a network bridge on the VM Host Server. It ensures proper networking capabilities of the VM Guest. Agree to do so by selecting , otherwise choose .
After the setup has been finished, you need to reboot the machine with the Xen kernel.

Tip: Default boot kernel
If everything works as expected, change the default boot kernel with YaST and make the Xen-enabled kernel the default. For more information about changing the default kernel, see Book “Reference”, Chapter 12 “The boot loader GRUB 2”, Section 12.3 “Configuring the boot loader with YaST”.
6.2.3 Installing specific installation patterns #Edit source
Related software packages from openSUSE Leap software repositories are
organized into installation patterns. You can use
these patterns to install specific virtualization components on an
already running openSUSE Leap. Use zypper to install
them:
zypper install -t pattern PATTERN_NAME
To install the KVM environment, consider the following patterns:
kvm_serverInstalls basic VM Host Server with the KVM and QEMU environments.
kvm_toolsInstalls
libvirttools for managing and monitoring VM Guests in KVM environment.
To install the Xen environment, consider the following patterns:
xen_serverInstalls a basic Xen VM Host Server.
xen_toolsInstalls
libvirttools for managing and monitoring VM Guests in Xen environment.
6.3 Installing UEFI support #Edit source
Note
We support UEFI Secure Boot on AMD64/Intel 64 guests only. KVM guests support UEFI Secure Boot by using the OVMF firmware. Xen HVM guests support booting from the OVMF firmware as well, but they do not support UEFI Secure Boot.
UEFI support is provided by OVMF (Open Virtual Machine Firmware). To enable UEFI boot, first install the qemu-ovmf-x86_64 or qemu-uefi-aarch64 package depending on the architecture of the guest.
The firmware used by virtual machines is auto-selected. The
auto-selection is based on the JSON files in the firmware package
described above. The libvirt QEMU driver parses those files during
loading to know the capabilities of multiple types of firmware. Then when
the user selects the type of firmware and any desired features (for
example, support for UEFI Secure Boot), libvirt can find a firmware file
that satisfies the user's requirements.
For example, to specify EFI with UEFI Secure Boot, use the following configuration:
<os firmware='efi'>
 <loader secure='yes'/>
</os>
The qemu-ovmf-x86_64 package contains the following important UEFI firmware images. They provide UEFI Secure Boot capability for VM Guests:
#rpm -ql qemu-ovmf-x86_64[...] /usr/share/qemu/ovmf-x86_64-smm-ms-code.bin /usr/share/qemu/ovmf-x86_64-smm-ms-vars.bin /usr/share/qemu/ovmf-x86_64-smm-opensuse-code.bin /usr/share/qemu/ovmf-x86_64-smm-opensuse-vars.bin /usr/share/qemu/ovmf-x86_64-smm-suse-code.bin /usr/share/qemu/ovmf-x86_64-smm-suse-vars.bin [...]
To use UEFI Secure Boot for SUSE Linux Enterprise guests, use the
ovmf-x86_64-smm-suse-code.binfirmware.To use UEFI Secure Boot for openSUSE guests, use the
ovmf-x86_64-smm-opensuse-code.binfirmware.To use UEFI Secure Boot for Microsoft Windows guests, use the
ovmf-x86_64-smm-ms-code.binfirmware.
For the AArch64 architecture, the package is named qemu-uefi-aarch32:
#rpm -ql qemu-uefi-aarch32[...] /usr/share/qemu/aavmf-aarch32-code.bin /usr/share/qemu/aavmf-aarch32-vars.bin /usr/share/qemu/firmware /usr/share/qemu/firmware/60-aavmf-aarch32.json /usr/share/qemu/qemu-uefi-aarch32.bin
The *-code.bin files are the UEFI firmware files.
The *-vars.bin files are corresponding variable
store images that can be used as a template for a per-VM non-volatile
store. libvirt copies the specified vars template to
a per-VM path under /var/lib/libvirt/qemu/nvram/
when first creating the VM. Files without code or
vars in the name can be used as a single UEFI image.
They are not as useful since no UEFI variables persist across power
cycles of the VM.
The *-ms*.bin files contain UEFI CA keys as found on
real hardware. Therefore, they are configured as the default in
libvirt. Likewise, the *-suse*.bin files contain
preinstalled SUSE keys. There is also a set of files with no
preinstalled keys.
For details, see Using UEFI Secure Boot and http://www.linux-kvm.org/downloads/lersek/ovmf-whitepaper-c770f8c.txt.
6.4 Enable nested virtualization in KVM #Edit source
Important: Technology preview
KVM's nested virtualization is still a technology preview. It is provided for testing purposes and is not supported.
Nested guests are KVM guests run in a KVM guest. When describing nested guests, we use the following virtualization layers:
- L0
A bare metal host running KVM.
- L1
A virtual machine running on L0. Because it can run another KVM, it is called a guest hypervisor.
- L2
A virtual machine running on L1. It is called a nested guest.
Nested virtualization has many advantages. You can benefit from it in the following scenarios:
Manage your own virtual machines directly with your hypervisor of choice in cloud environments.
Enable the live migration of hypervisors and their guest virtual machines as a single entity.

Note
Live migration of a nested VM Guest is not supported.
Use it for software development and testing.
To enable nesting temporarily, remove the module and reload it with the
nested KVM module parameter:
For Intel CPUs, run:
>sudomodprobe -r kvm_intel && modprobe kvm_intel nested=1For AMD CPUs, run:
>sudomodprobe -r kvm_amd && modprobe kvm_amd nested=1
To enable nesting permanently, enable the nested KVM
module parameter in the /etc/modprobe.d/kvm_*.conf
file, depending on your CPU:
For Intel CPUs, edit
/etc/modprobe.d/kvm_intel.confand add the following line:options kvm_intel nested=1
For AMD CPUs, edit
/etc/modprobe.d/kvm_amd.confand add the following line:options kvm_amd nested=1
When your L0 host is capable of nesting, you can start an L1 guest in one of the following ways:
Use the
-cpu hostQEMU command line option.Add the
vmx(for Intel CPUs) or thesvm(for AMD CPUs) CPU feature to the-cpuQEMU command line option, which enables virtualization for the virtual CPU.
6.4.1 VMware ESX as a guest hypervisor #Edit source
If you use VMware ESX as a guest hypervisor on top of a KVM bare metal hypervisor, you may experience unstable network communication. This problem occurs especially between nested KVM guests and the KVM bare metal hypervisor or external network. The following default CPU configuration of the nested KVM guest is causing the problem:
<cpu mode='host-model' check='partial'/>
To fix it, modify the CPU configuration as follow:
[...]
<cpu mode='host-passthrough' check='none'>
 <cache mode='passthrough'/>
</cpu>
[...]